
Getting oh so close to finished now. A quick trip up to Perth as I had a warning light show up on the van which needed seeing too, turned out to be an intermittent fault with the alternator that’s being replaced today. This has given me a good chance to have a bit of a shake down of the van, see how all the living aspects of of the fit out are working or are going to work in real life.
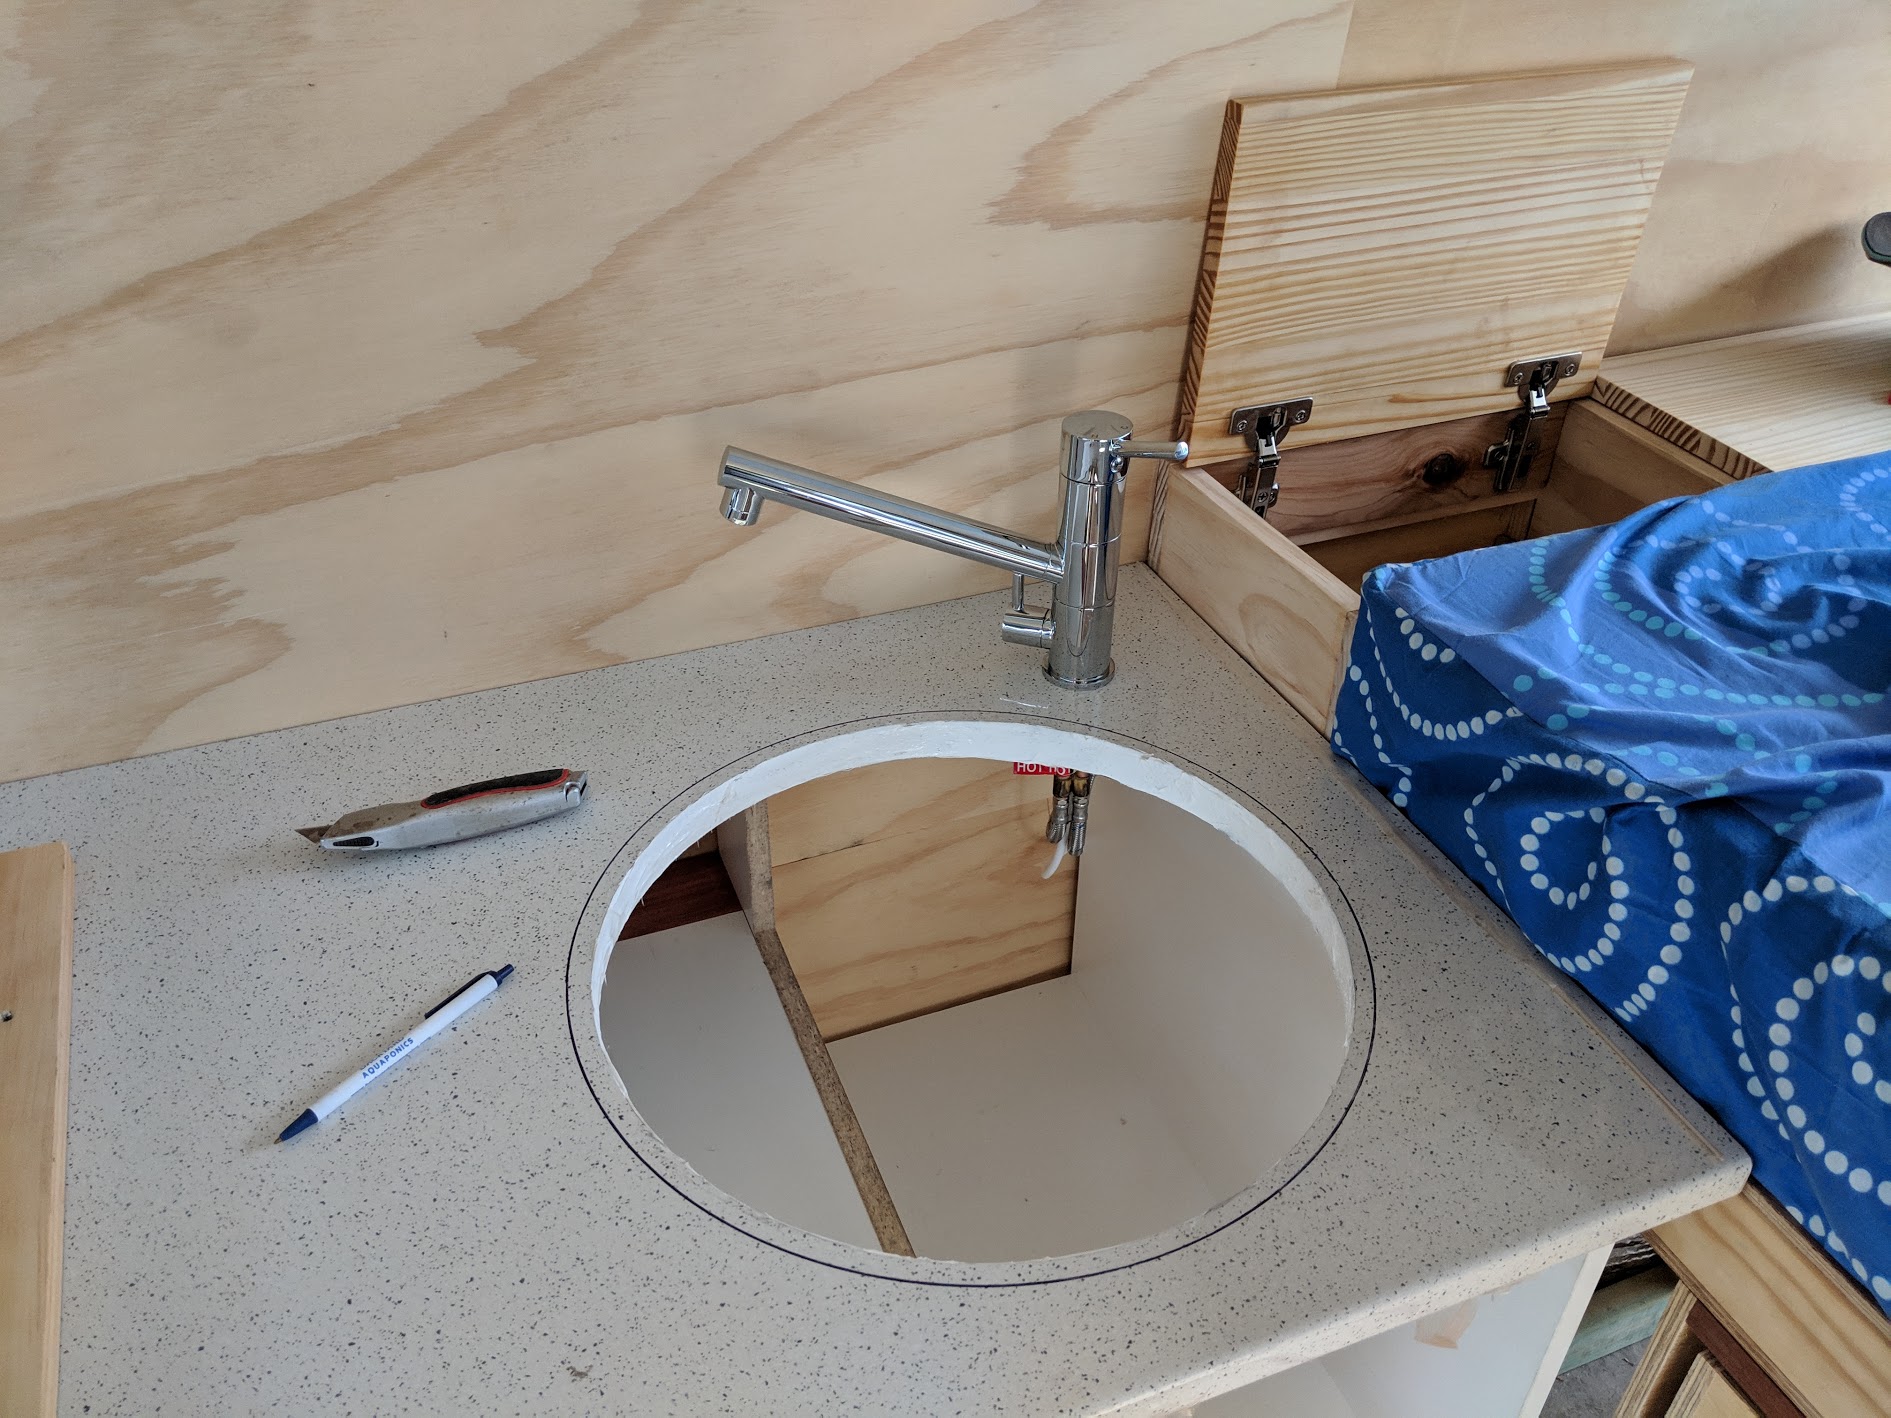
But back to about a month ago and where I was with the fit-out at that stage. Installing the plumbing was reasonably straight forward.
Plumbing installation
Though I discovered that with the “John Guest push-in” style of fitting you really need to have perfect pipe cuts and perfect installation of pipe into fittings. I had 3 fittings which were leaking but a quick rehash of my pipe cuts and re-insertion into the fittings had a nice tight seal and all was good, leaks all gone which was a relief as I didn’t want to have to pull apart the whole lot and start again.
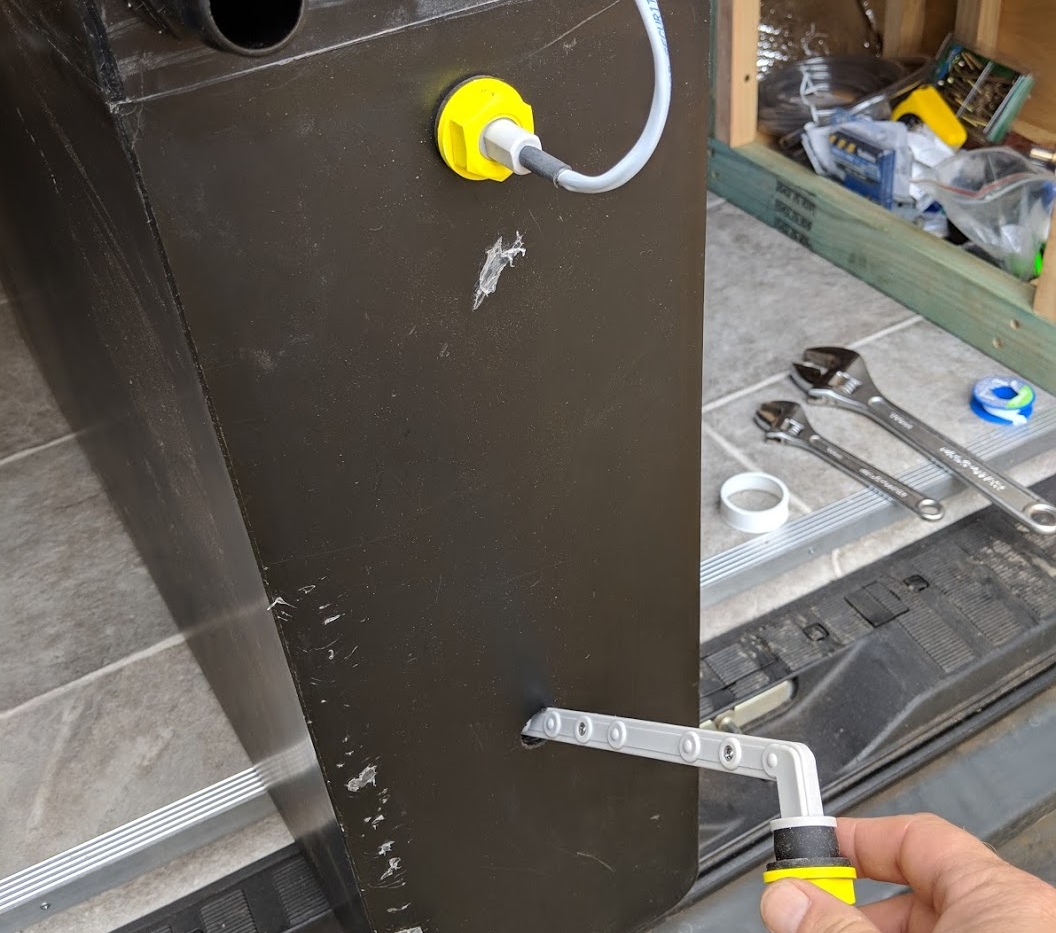
Tank level senders
The next aspect I had issues with was the installation of the tank level sensors, both of them leaked. Their mounting is quite finicky, they rely on the rubber grommet going in the hole, then as you tighten the outside yellow nut the grommet expands and fills the hole creating the water tight seal. My first installation I over tightened it just a touch and the rubber formed a crease in it which then always leaked no matter what I did. Same with the second one, I would screw it up very lightly but there was a leak, then as I slowly tightened it a little more to stop the leak, the rubber would bulge and distort and the leak would get worse. Must be a fine art to installing these. So I gave up, threaded the holes and installed some bungs. Perhaps one day I may drill two more holes and run a clear pipe from top to bottom so you can see the water level “old school”.
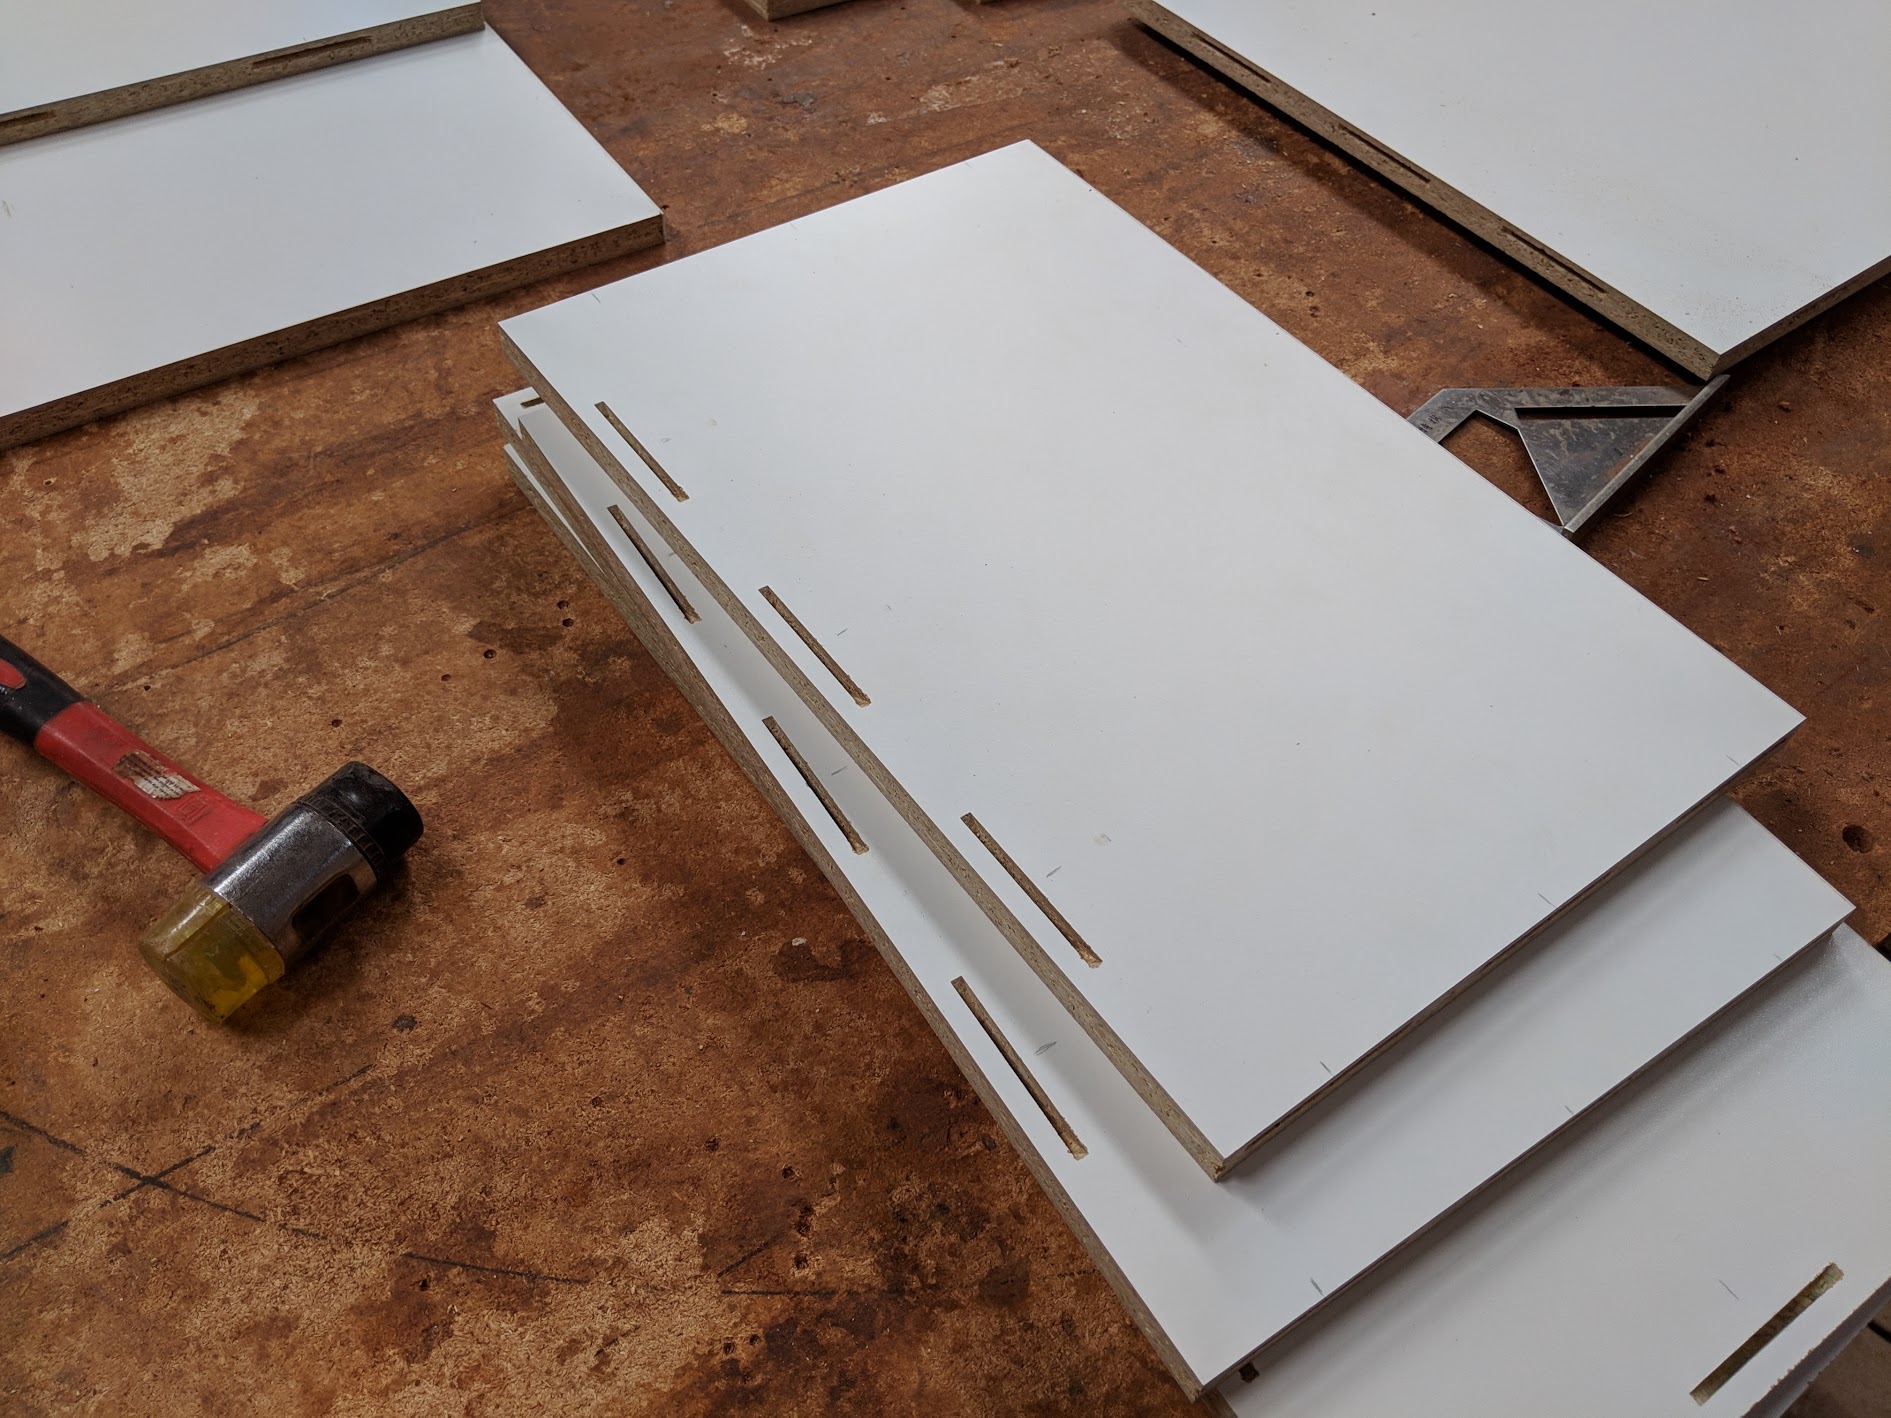
Biscuits
Drawers were being biscuit glued and screwed for extra strength.
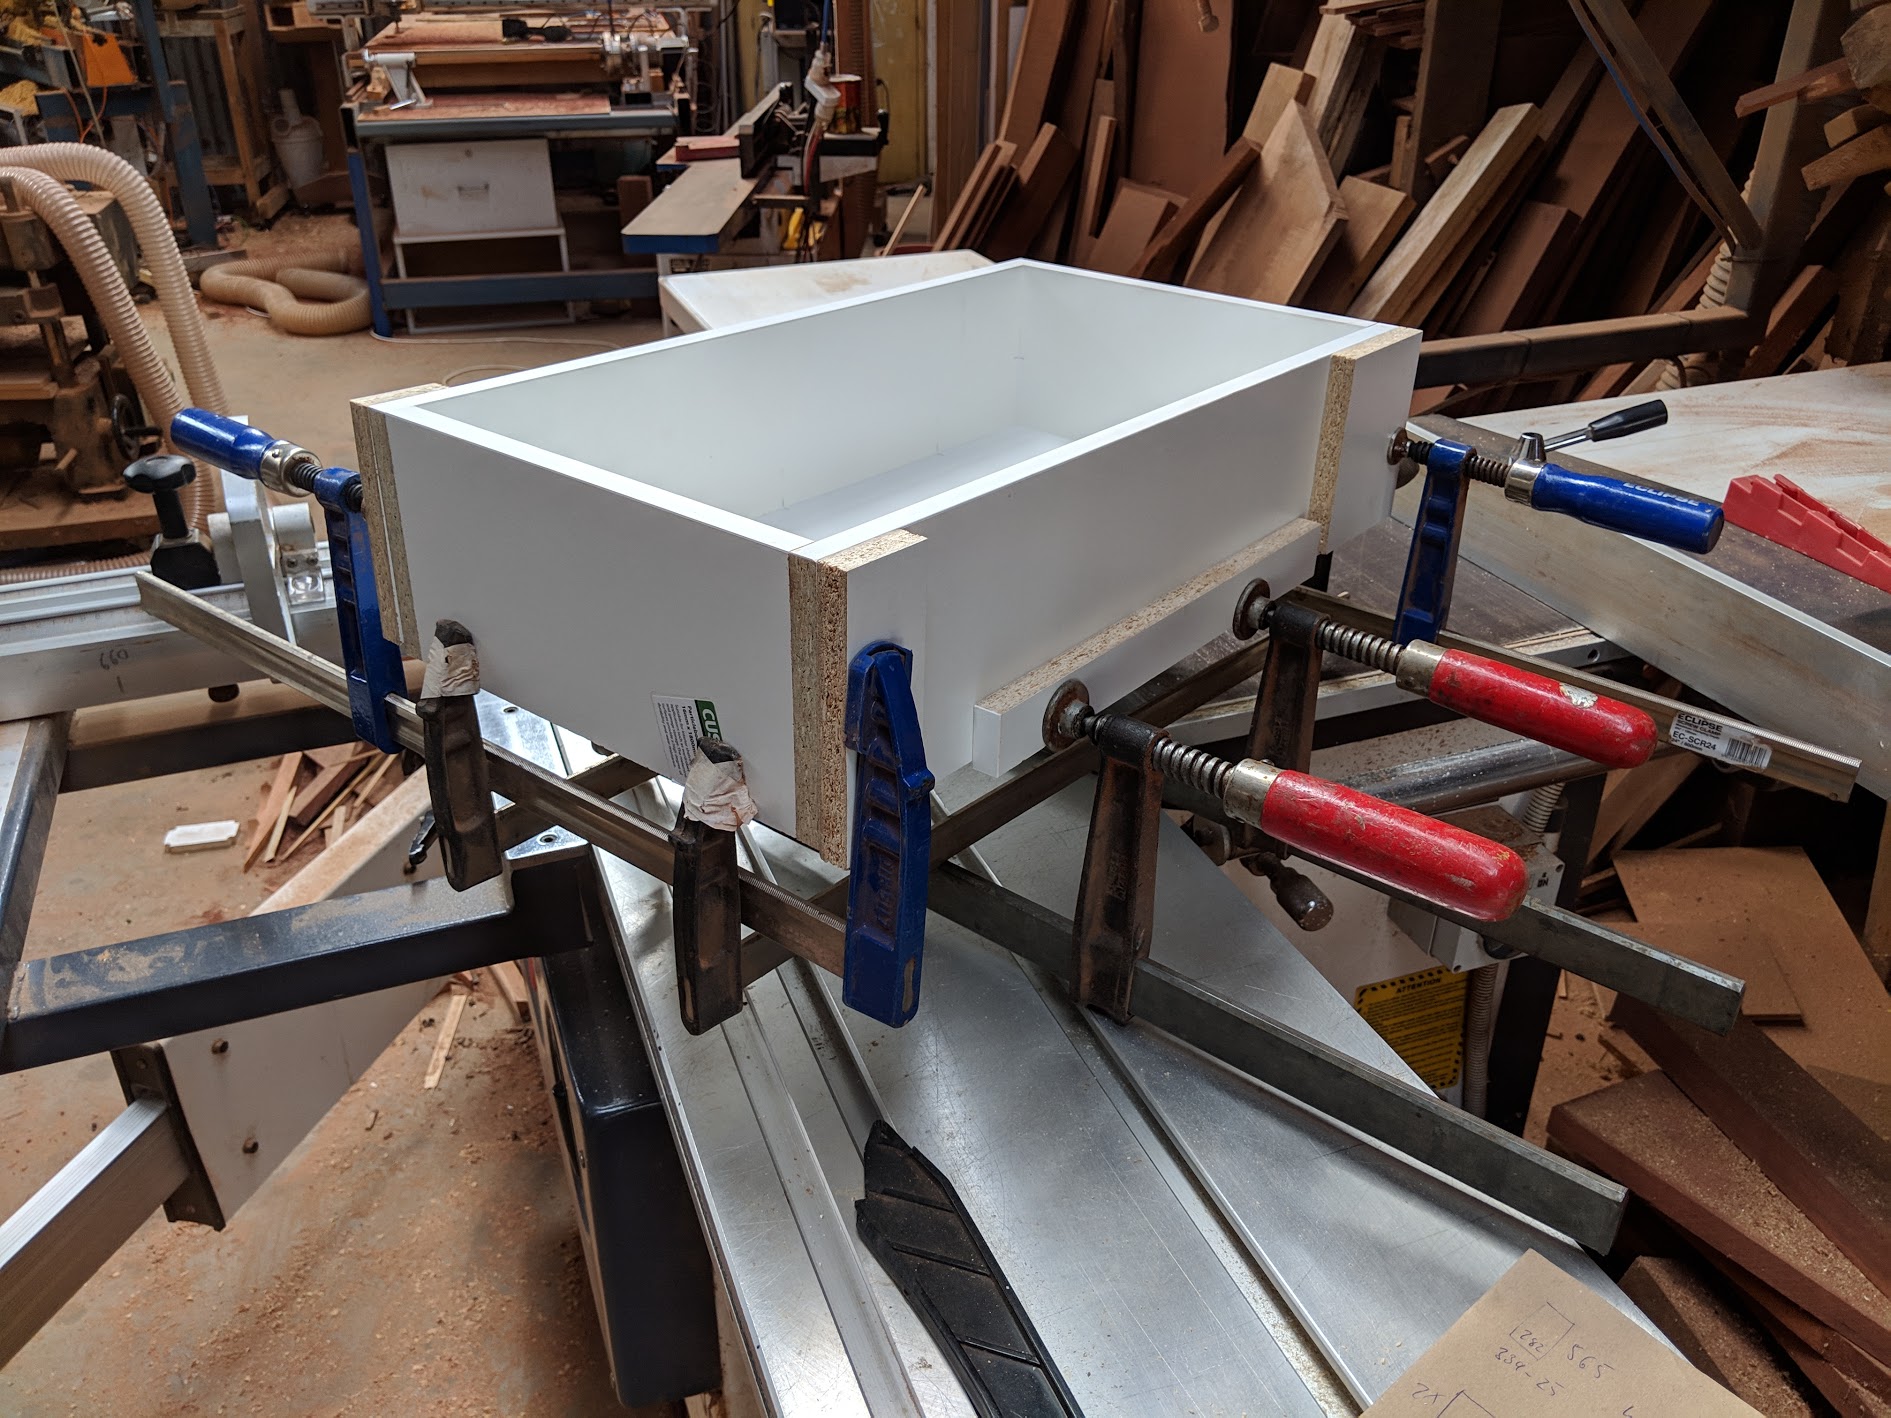
Clamped
Seriously clamped up over night while the glue dried.
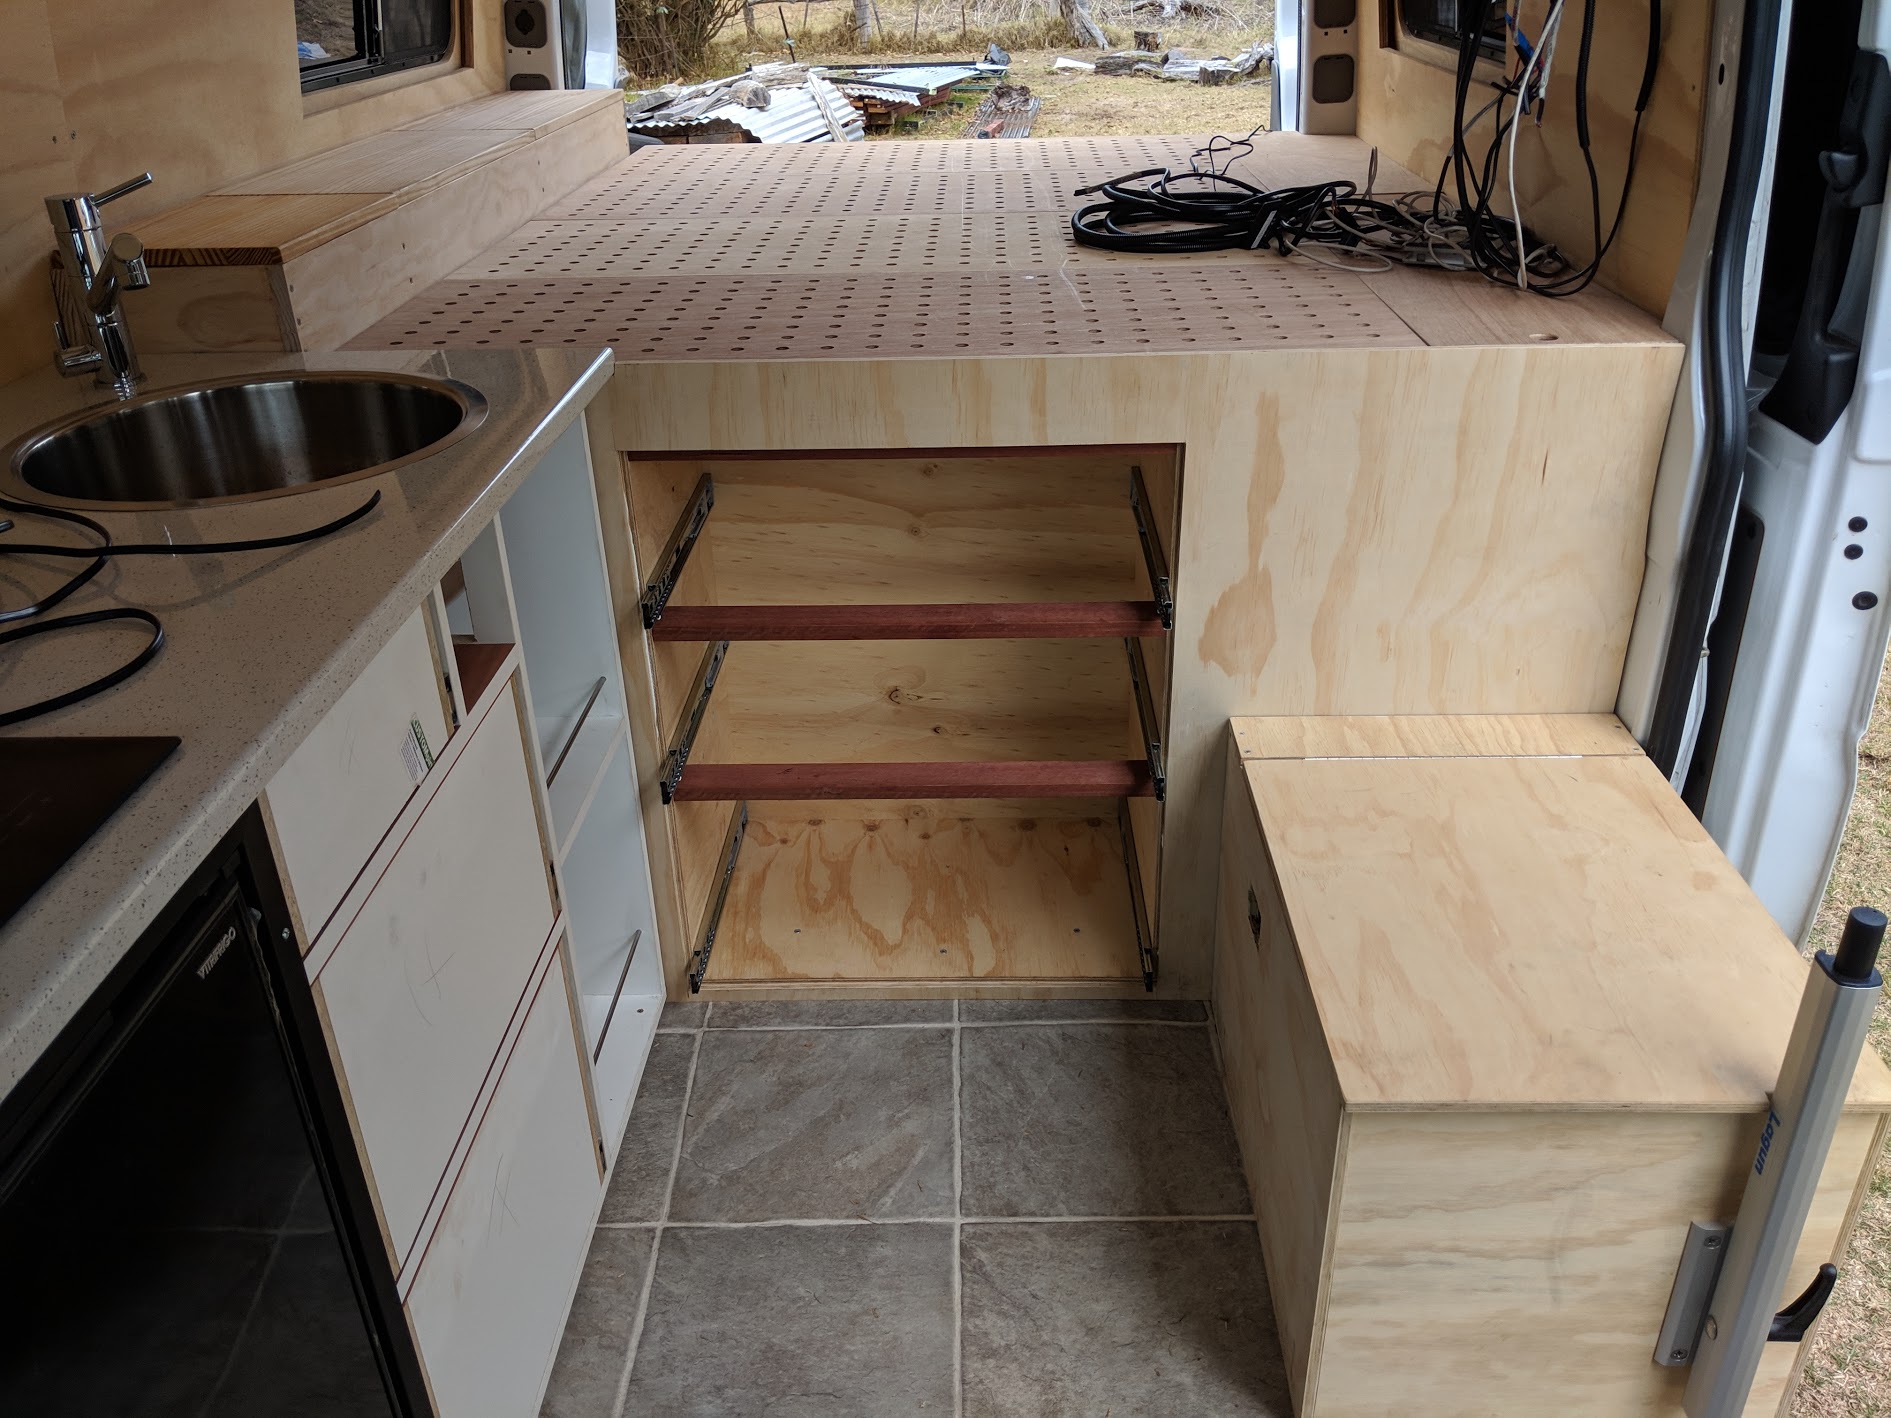
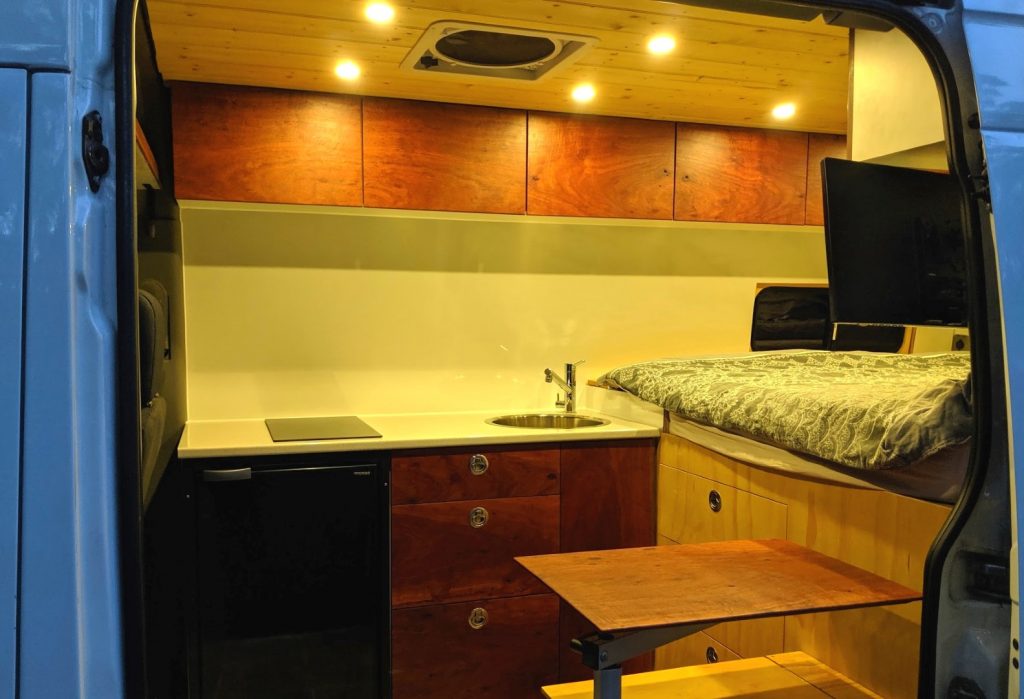
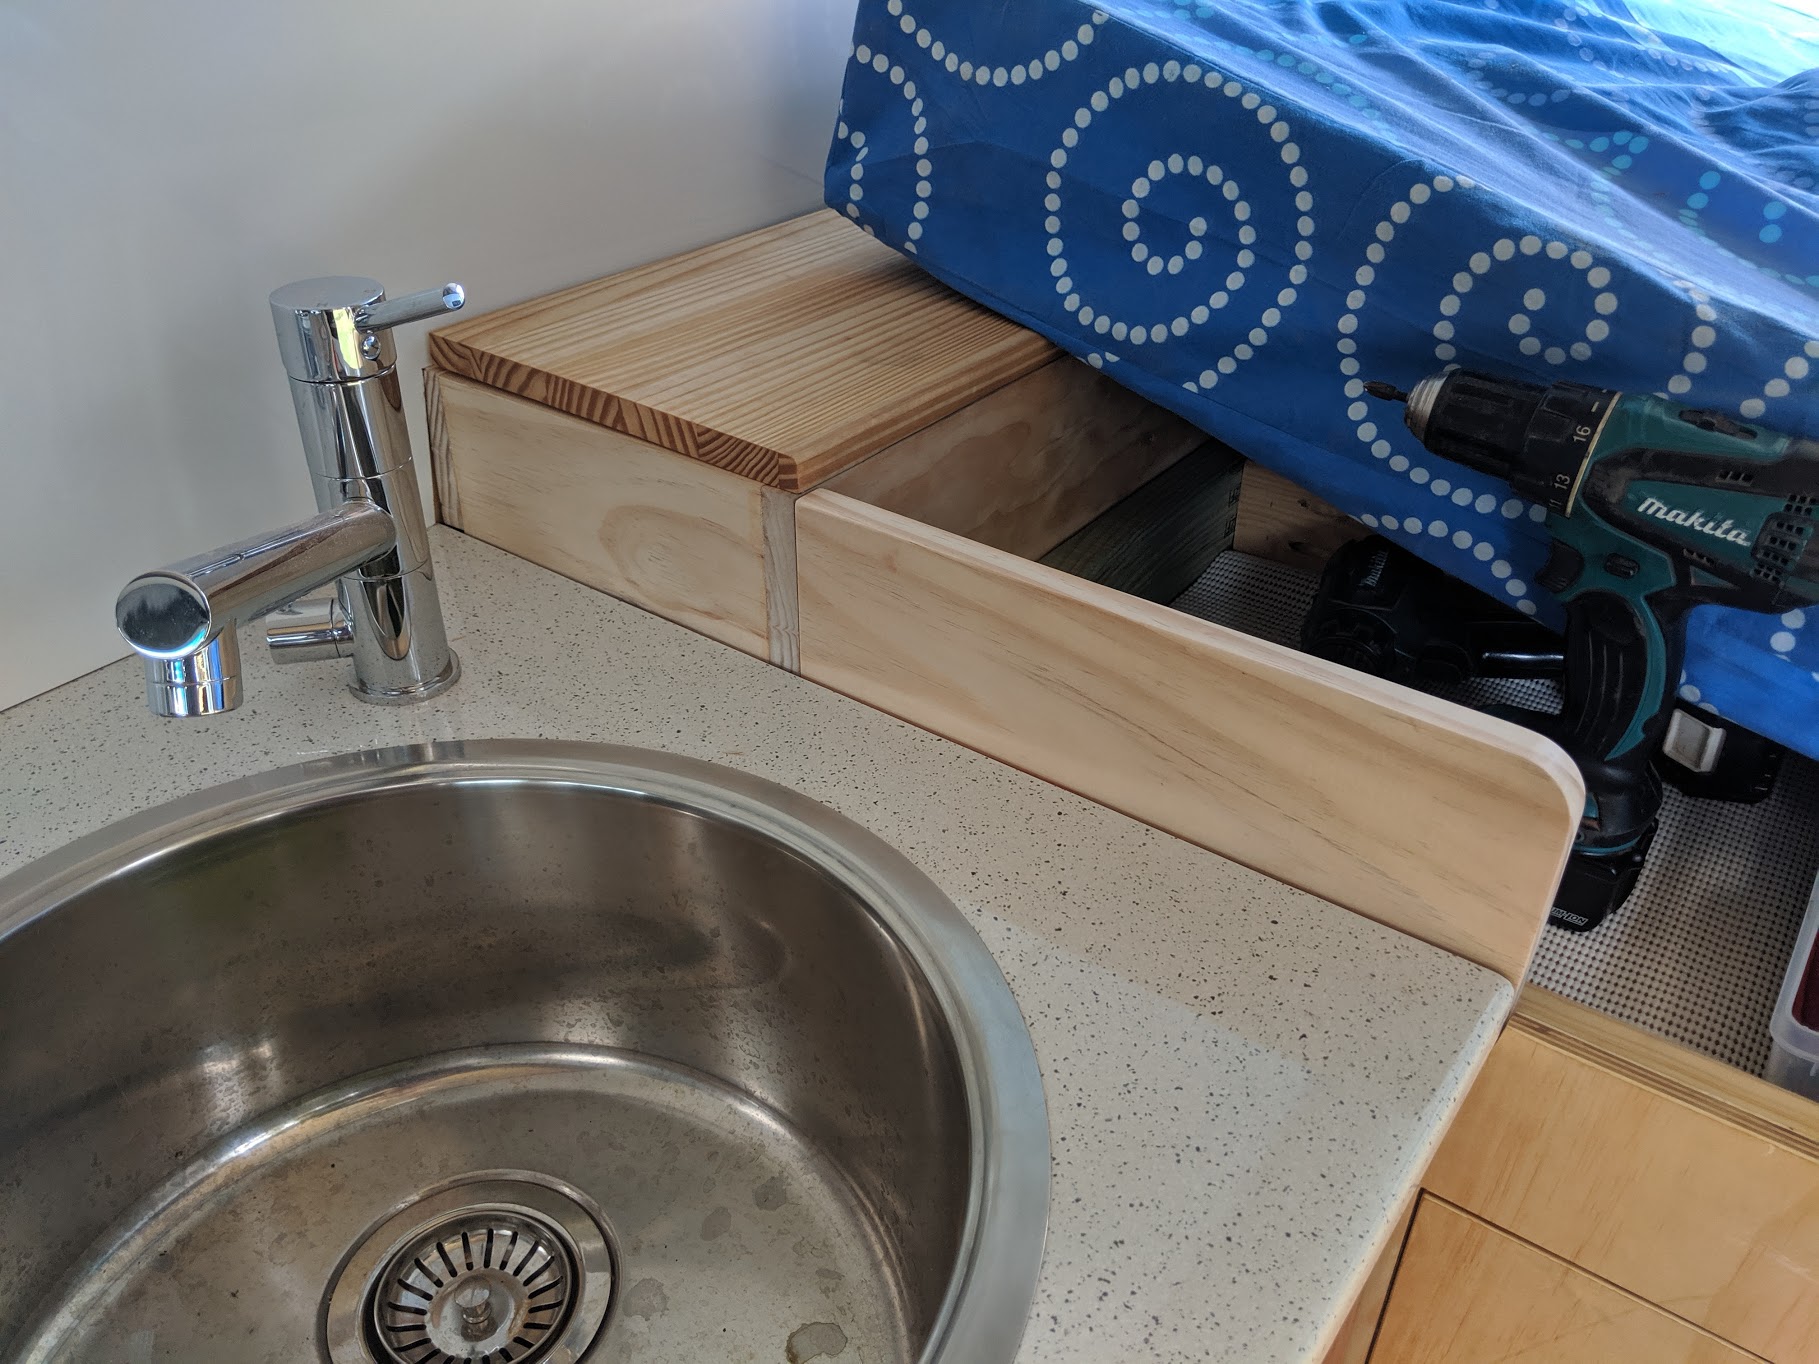
Kitchen drawers
Kitchen drawers are in, I decided to redo the board under the bed surrounding the clothes drawers.I bought a whole sheet of ply to fit here and cut out the drawer fronts using the CNC machine, that way the grain would match across the complete sheet as well as the three drawers. I also installed the table mount onto my wooden box by the door.
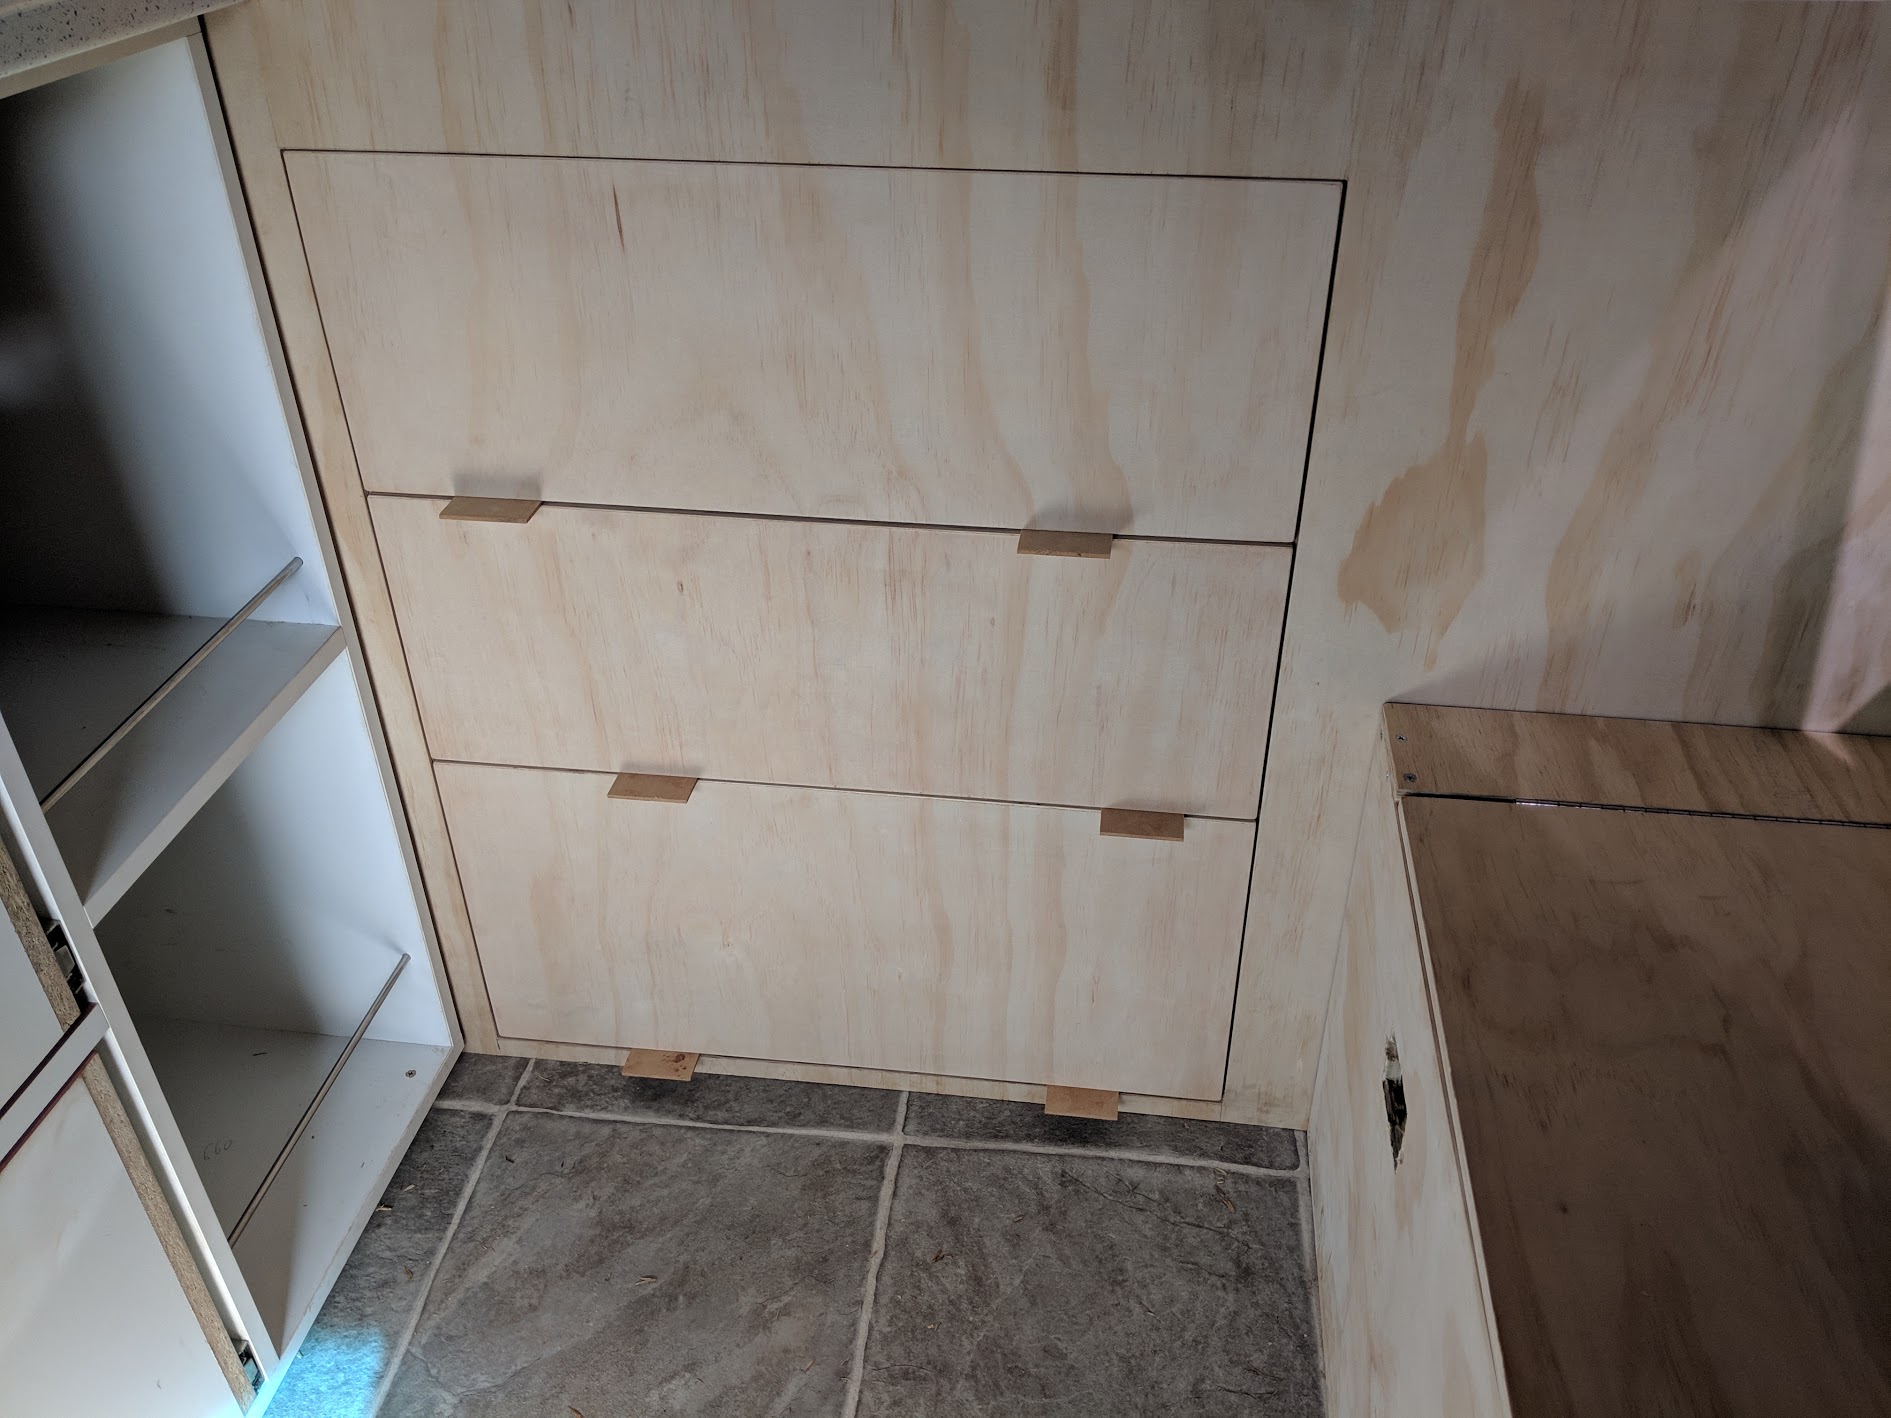
Drawer fronts
Now fitting the drawer fronts, this was really quite tricky figuring out where the latches needed to be installed, lots of measuring and thinking involved.
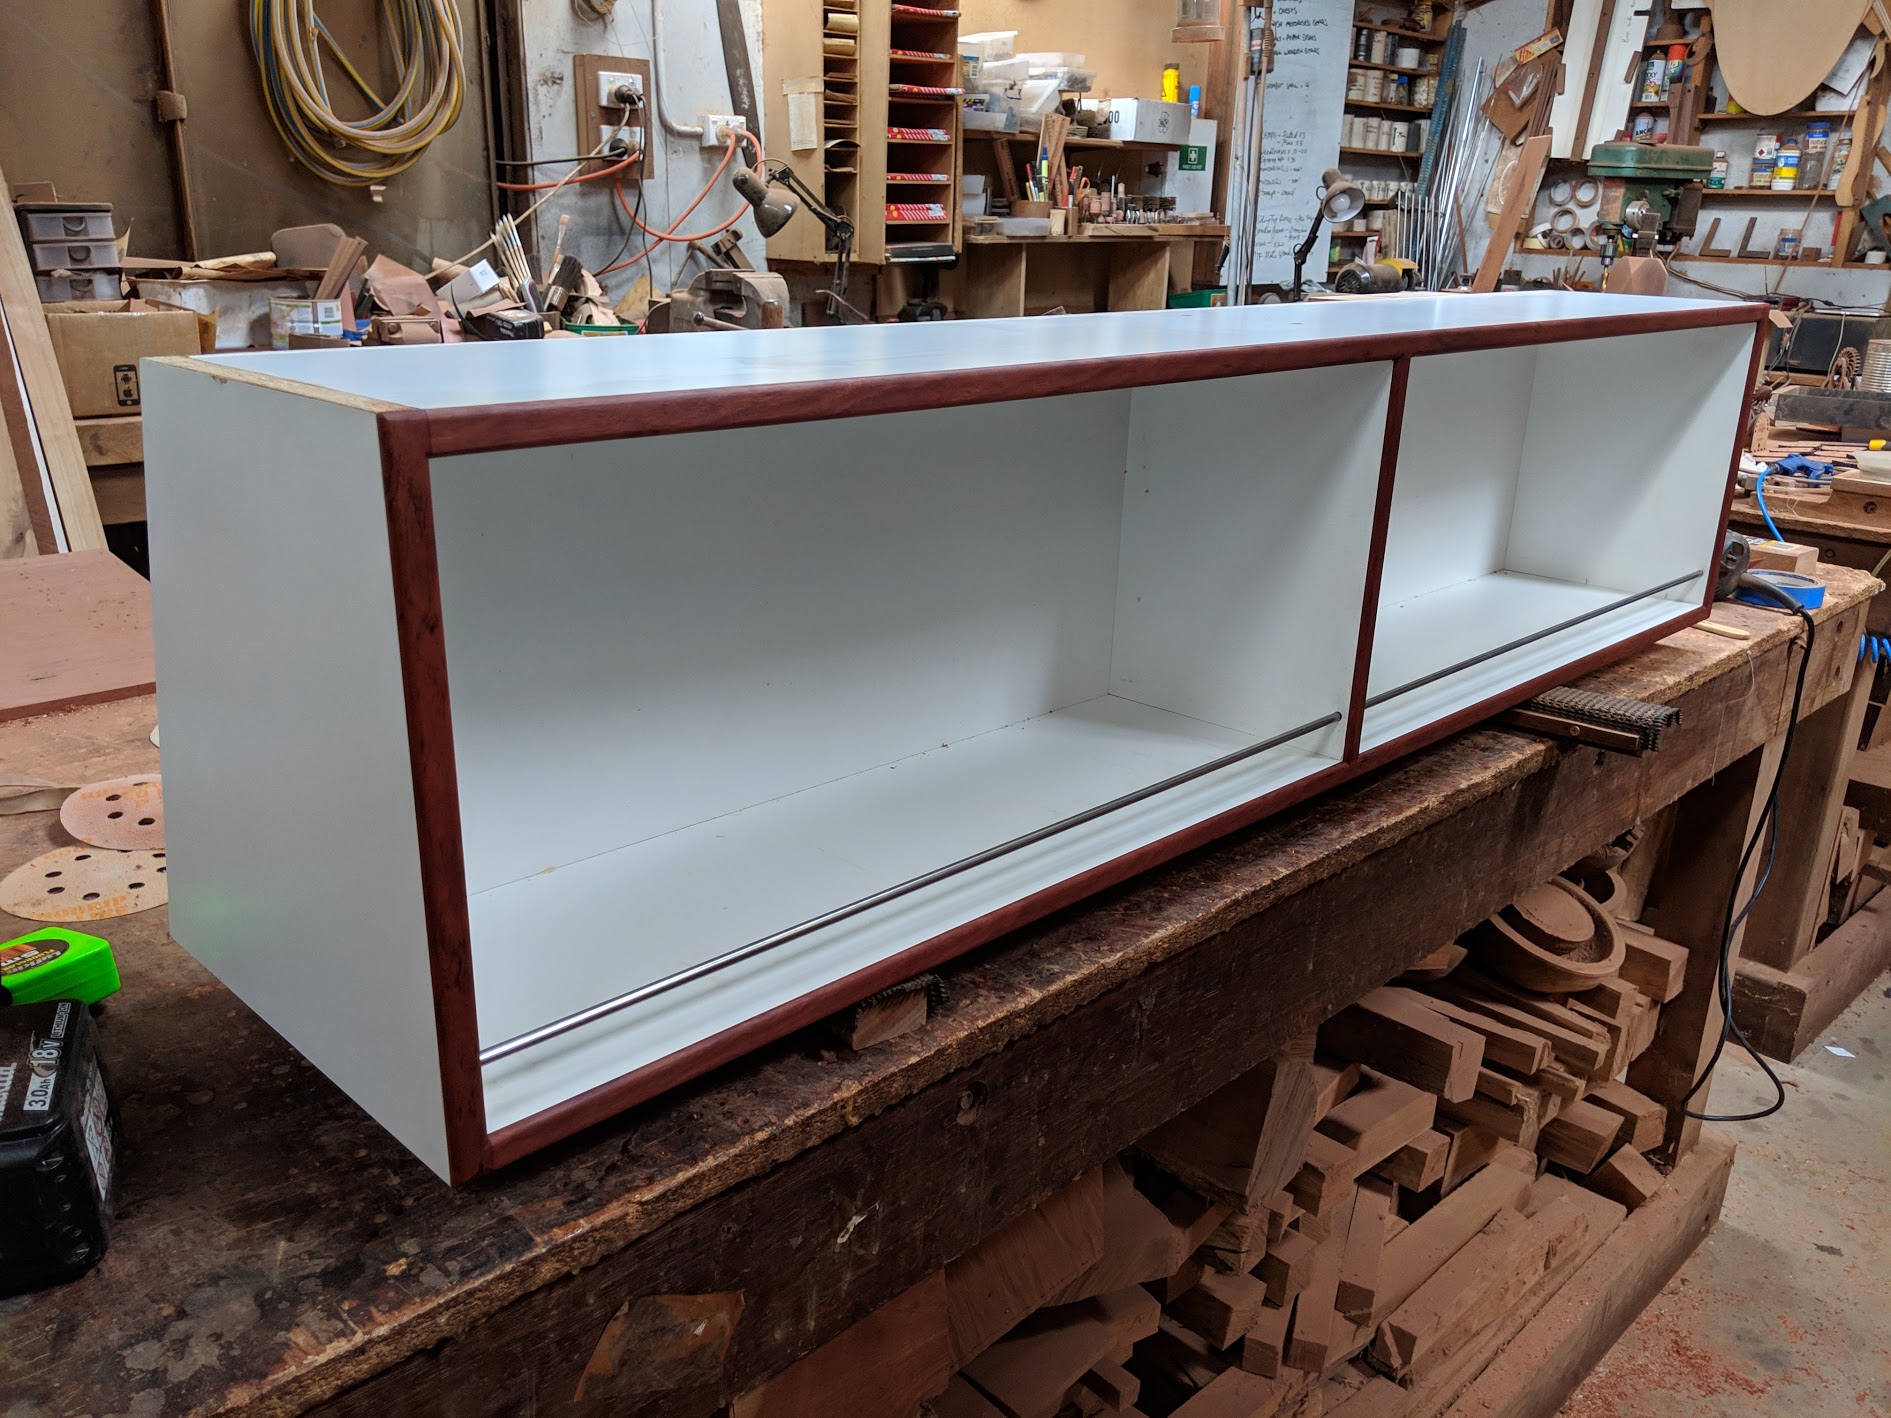
Overhead cabinet passenger side
The passenger side upper cabinet was a bookshelf for books and other assorted bits. To make this stronger to handle the weight of books the cabinet was built with a solid vertical back which wastes some space behind the cabinet but offers piece of mind in it’s structural integrity. Same polished stainless steel rod as all the other cabinets and a thin jarrah feature front to tie it in with everything else.
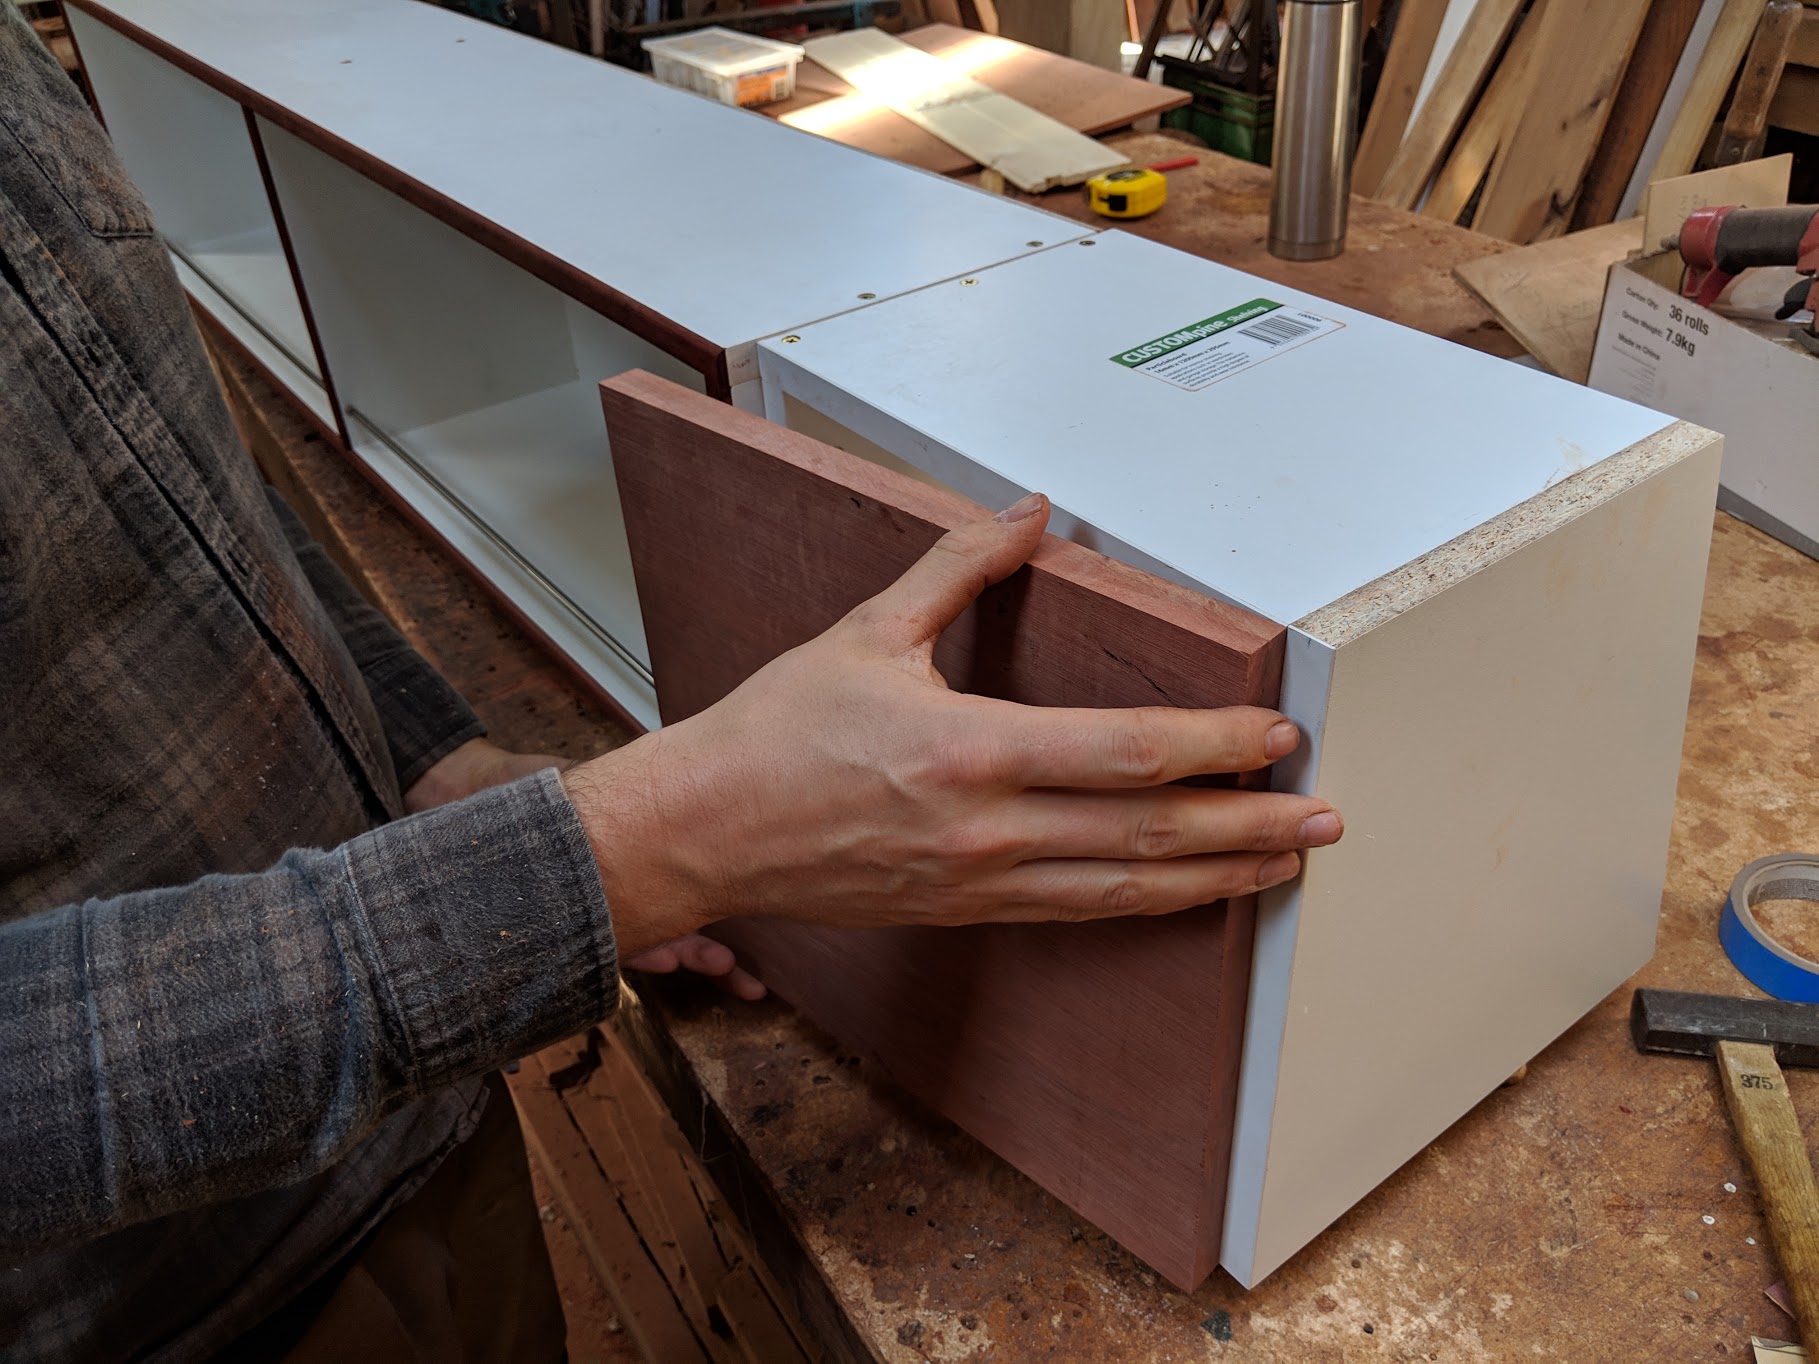
Electrical cabinet
The control cabinet is a separate box screwed to the end of the bookshelf with a nice jarrah front face made to slide into place and then be screwed from the bookshelf side so that the screws are hidden.
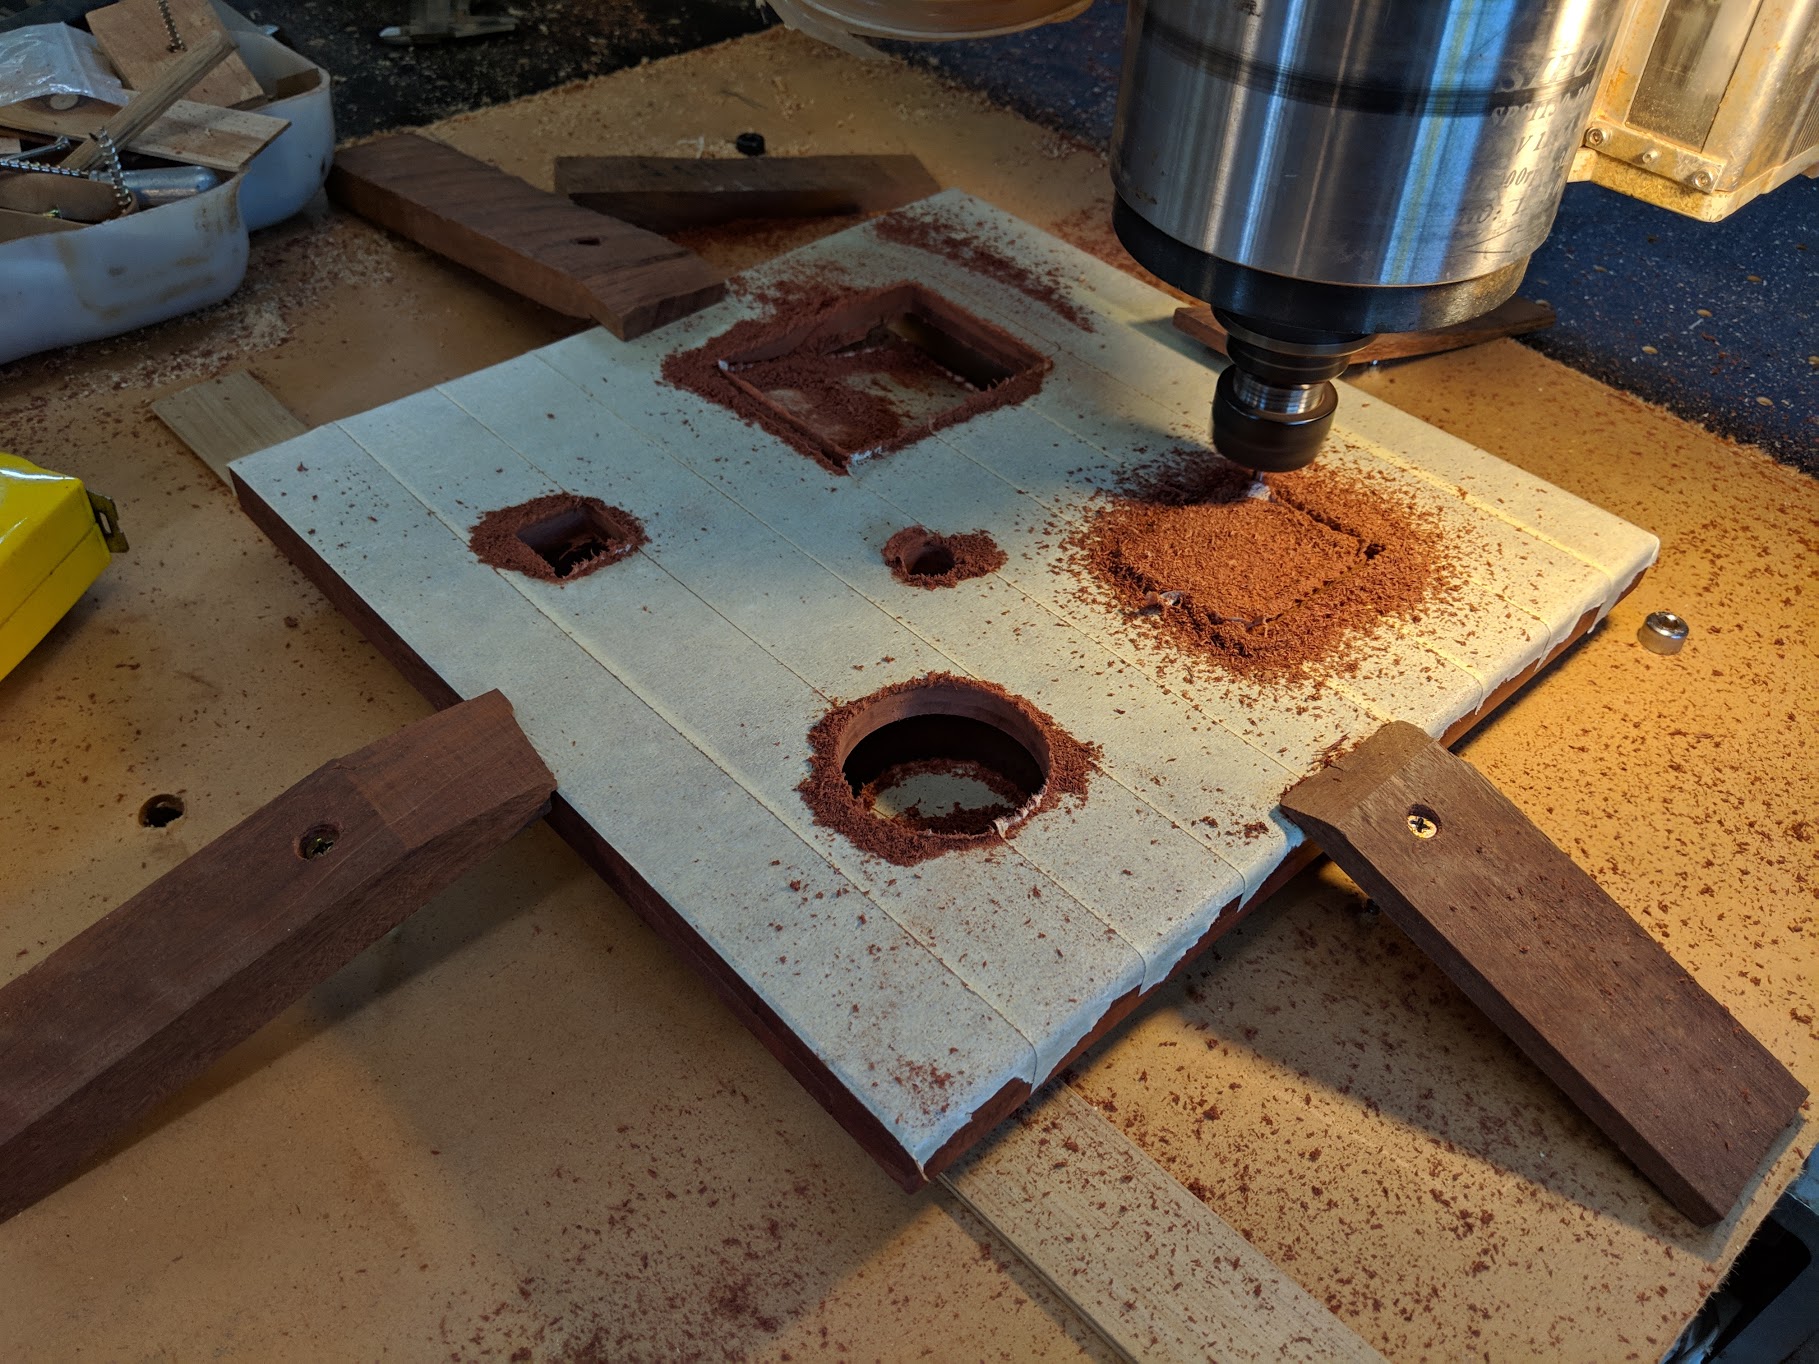
Control panel
Good learning experiences for me with programming the CNC machine to make the cut outs. No room for error here because the door is made and finished, making a new one would take hours.
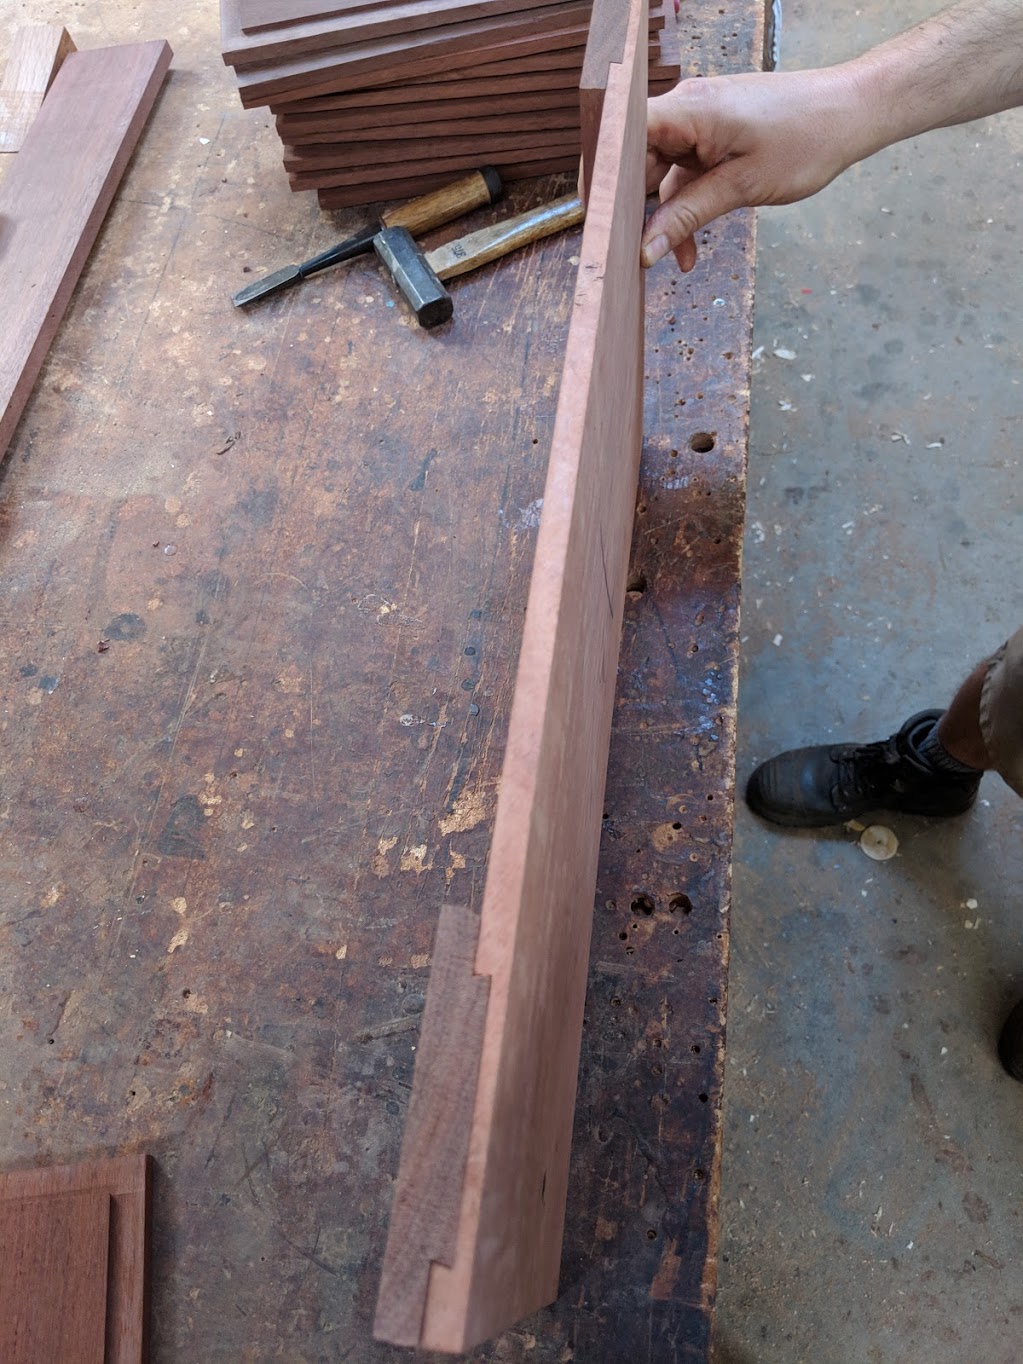
Doors
Creating the doors for this van isn’t a simple task, because I’m difficult and wanted solid single piece jarrah door fronts, Matt took a lot of time figuring out how to make them using thin door fronts and large dove tails joints down their length. The problem with large slabs of timber is that they want to warp as temperatures and humidity changes which happens constantly in a motor home. Also jarrah is very heavy, so making it as thin as possible helps with weight and also helps keep warping to a minimum while the dove tail frame at the back allows the doors to move, expand and shrink without warping because it can slide along the dove tail joint.

Upper doors in
Things were starting to take shape, upper doors all in, kitchen fronts being worked on by Matt, it was time for me to get on with the shelf above the front seats. There’s a lot of space above the seats and I’ve seen a few conversions where people had built shelves or cupboards, I’d pre-bent some angle brackets to the odd angle required, painted them black and bolted them in place using existing bolts in the door pillar and the upper hand grab, I’d made a rough cardboard template, then used this to cut out a 12mm thick ply panel.
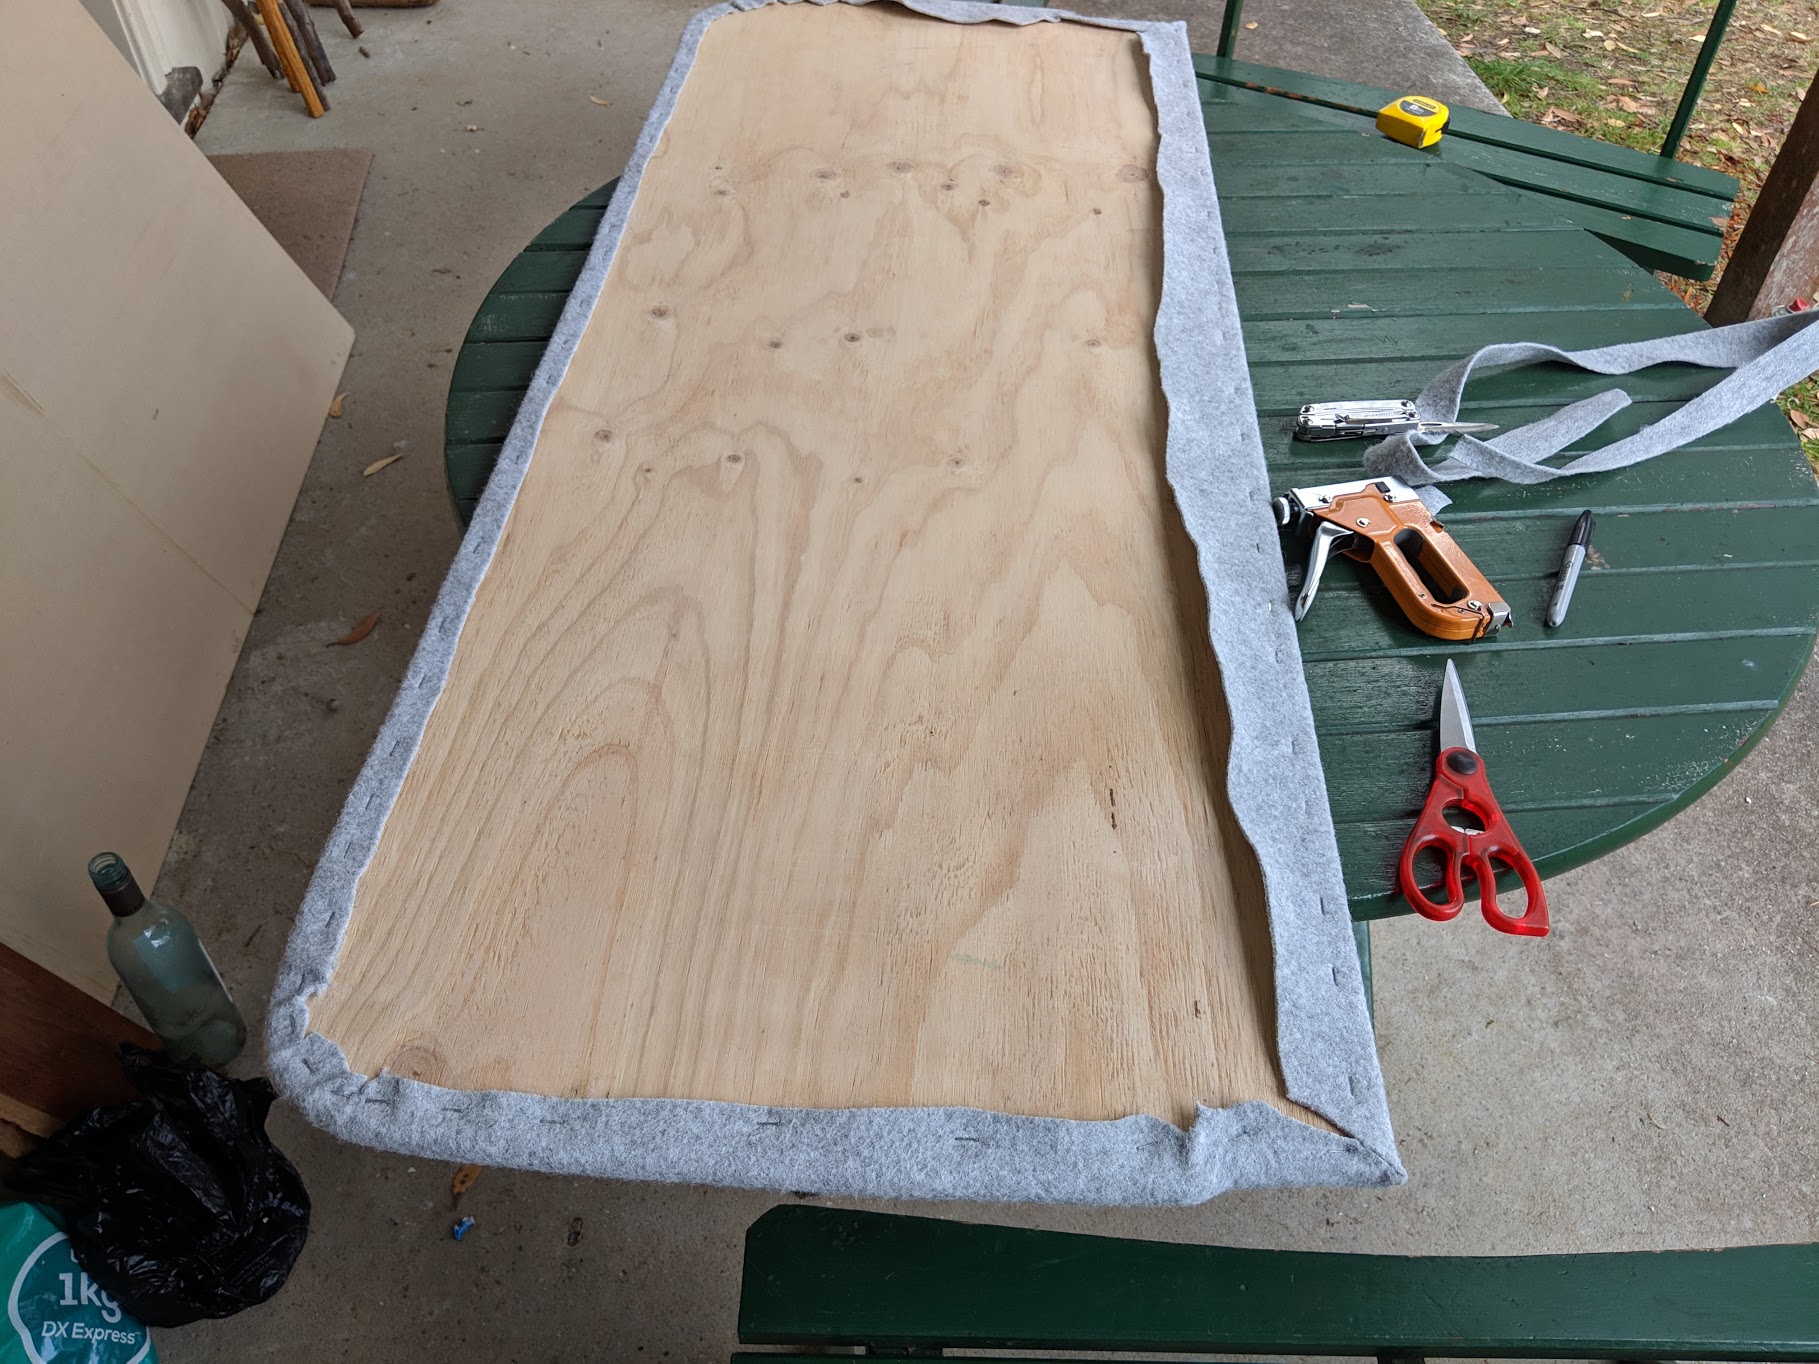
Overhead shelf
Carpeting the overhead shelf made it blend in beautifully with the rest of the cab and for added strength I also screwed 2 pieces of angle aluminium into the topside of the board. One toward the front of the vehicle (back of the shelf) was being hidden by carpet. The second piece was screwed right along the edge near the living area, then I fixed up a nice strip of jarrah and screwed and glued it along the edge, using the aluminium. It came up a treat, fitting right in.

Upper shelf
All the doors are now in and I’m really starting to get a feel for the clean lines in the van.

All doors in
The original white material I have installed on the walls here wasn’t going to cut it, it was substandard material usually used for backing in cupboards so I was using it here to make templates and had to find another better material.
Better
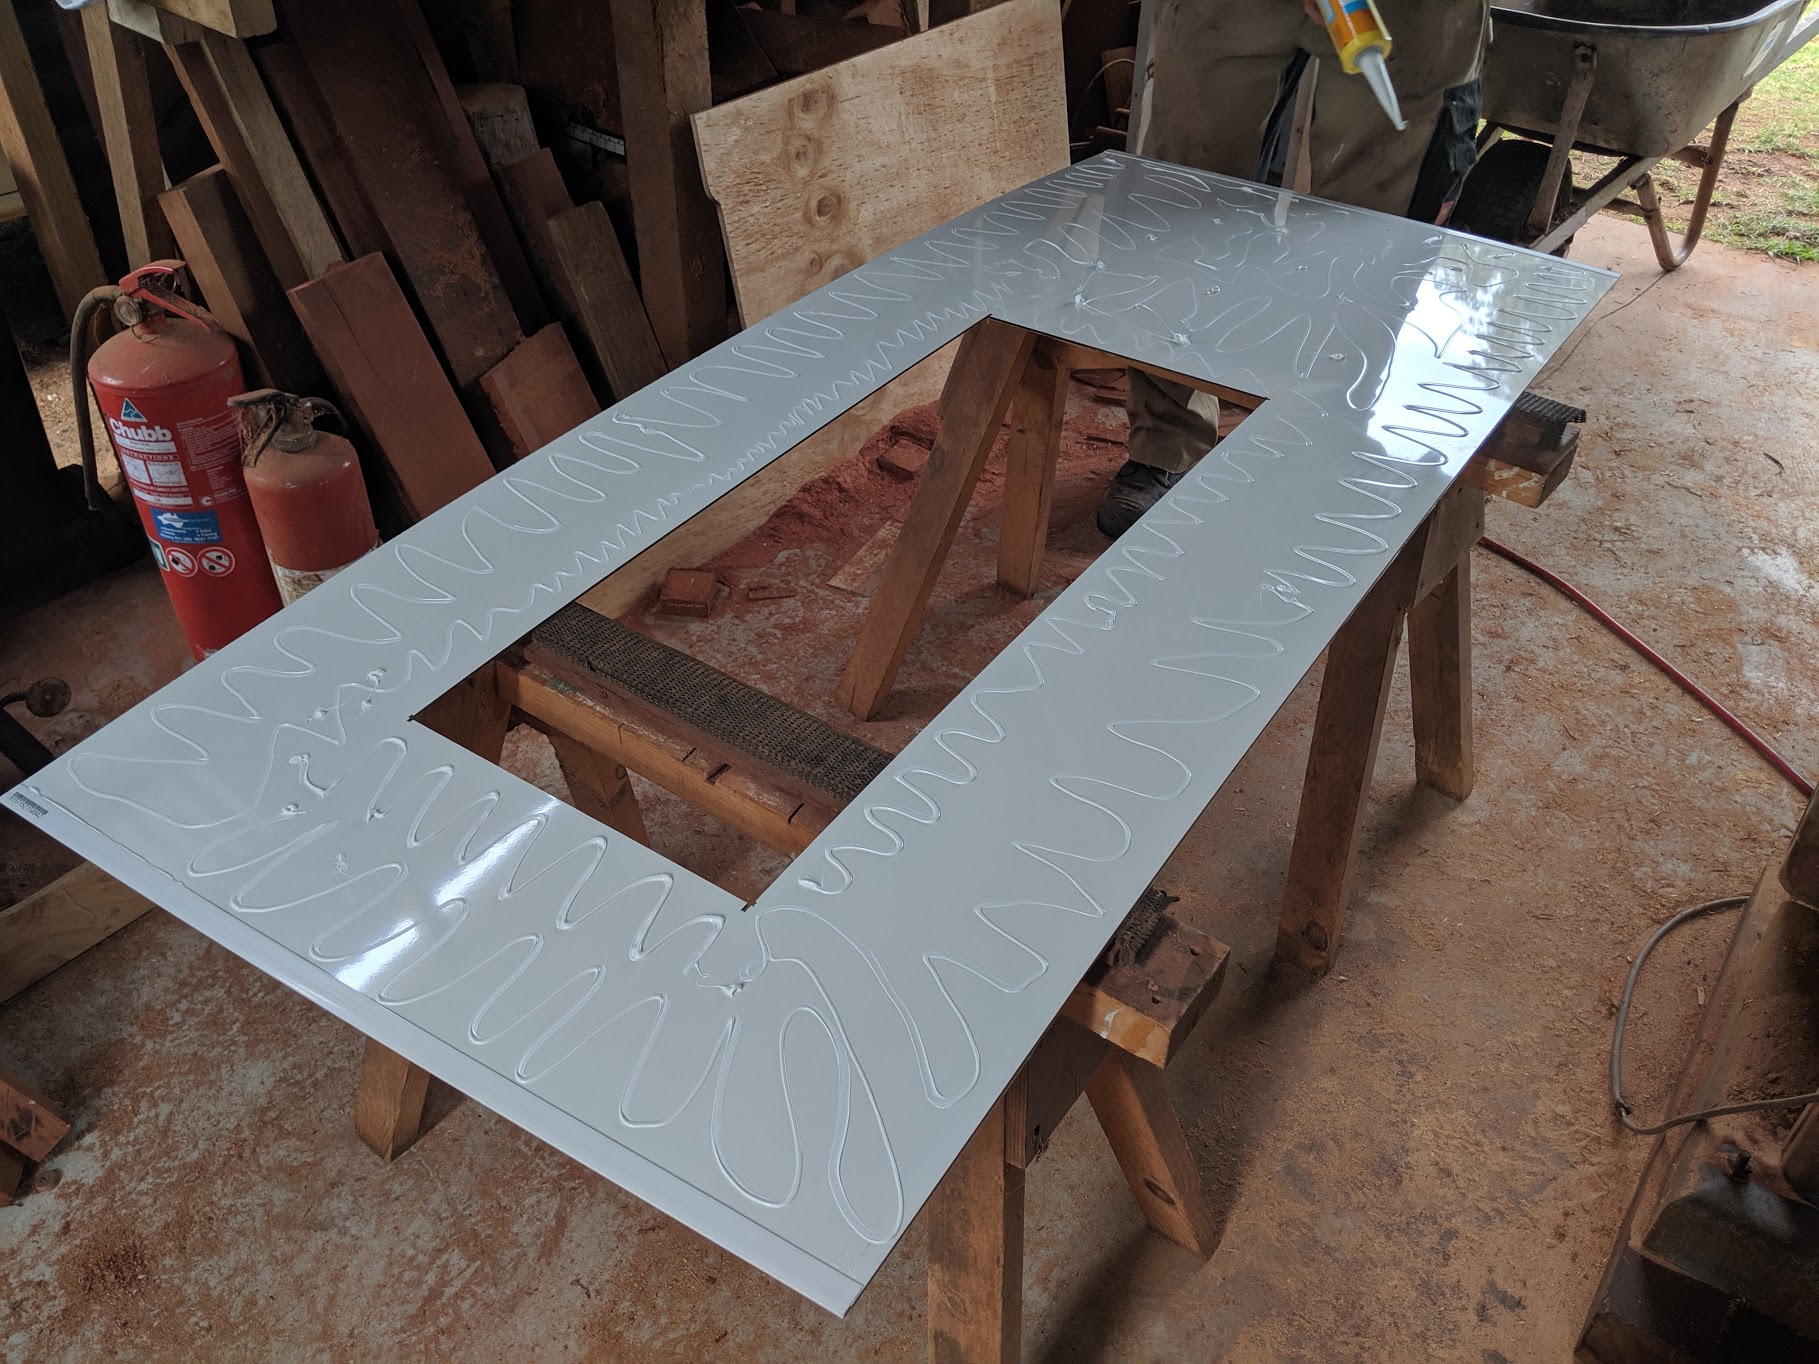
Three millimetre panel made for use in showers and wet areas, very strong, waterproof and expensive, this wasn’t going anywhere once it was stuck to the ply walls.
Little bit
This additional small piece of wood was going to help separate the bed from the kitchen especially once I’d glued on a piece of the white waterproof material and all the gaps and joins are nicely siliconed.
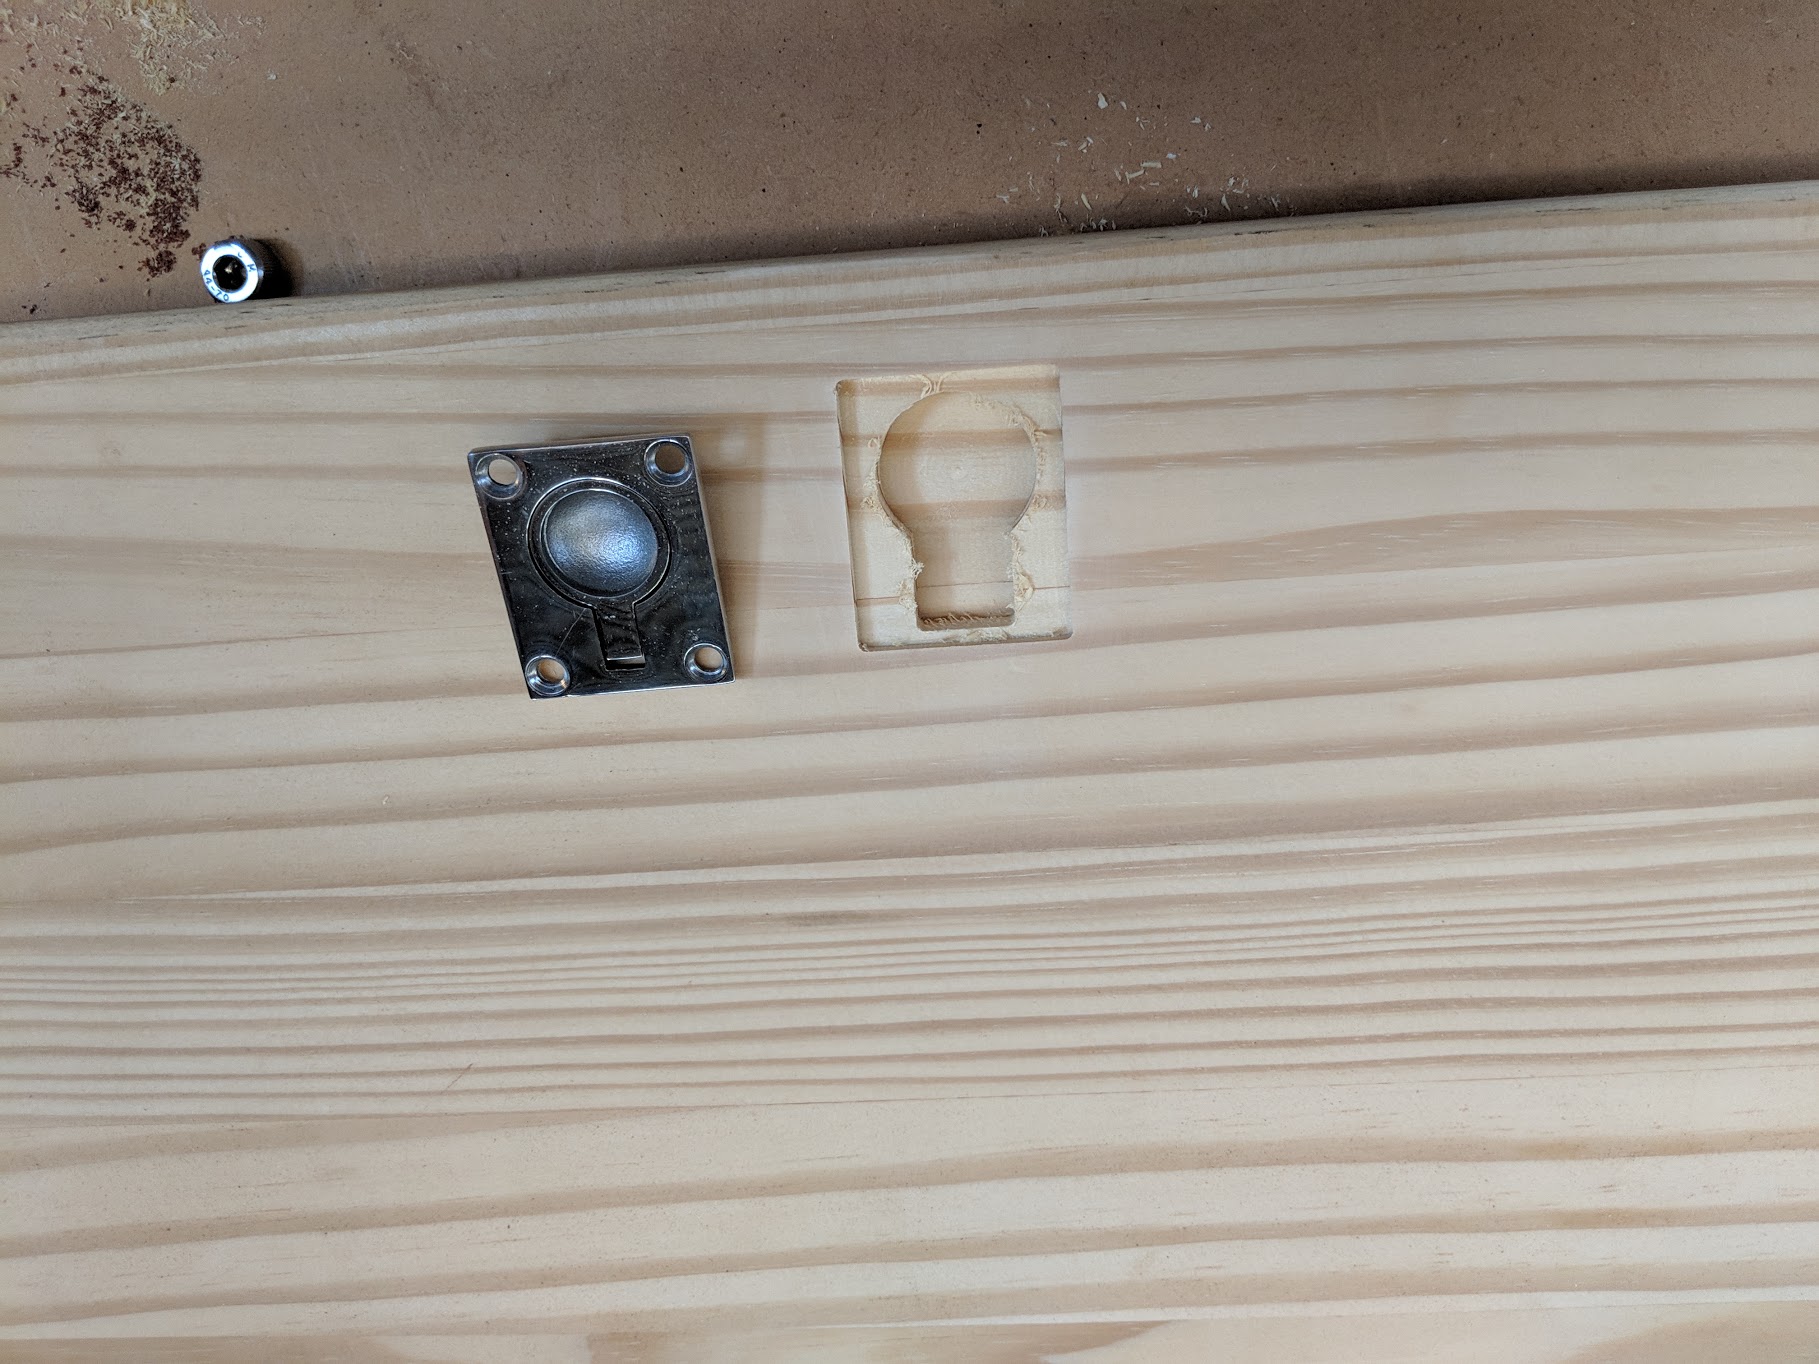
Fitting fittings
The doors on the cupboards beside the beds needed their stainless fitting installed, this required some more fiddling with the CNC machine to route out the required shape so the fittings sit flush. I almost wonder if I would have been better off doing it old school by hand as it took me a whole day to get it right.
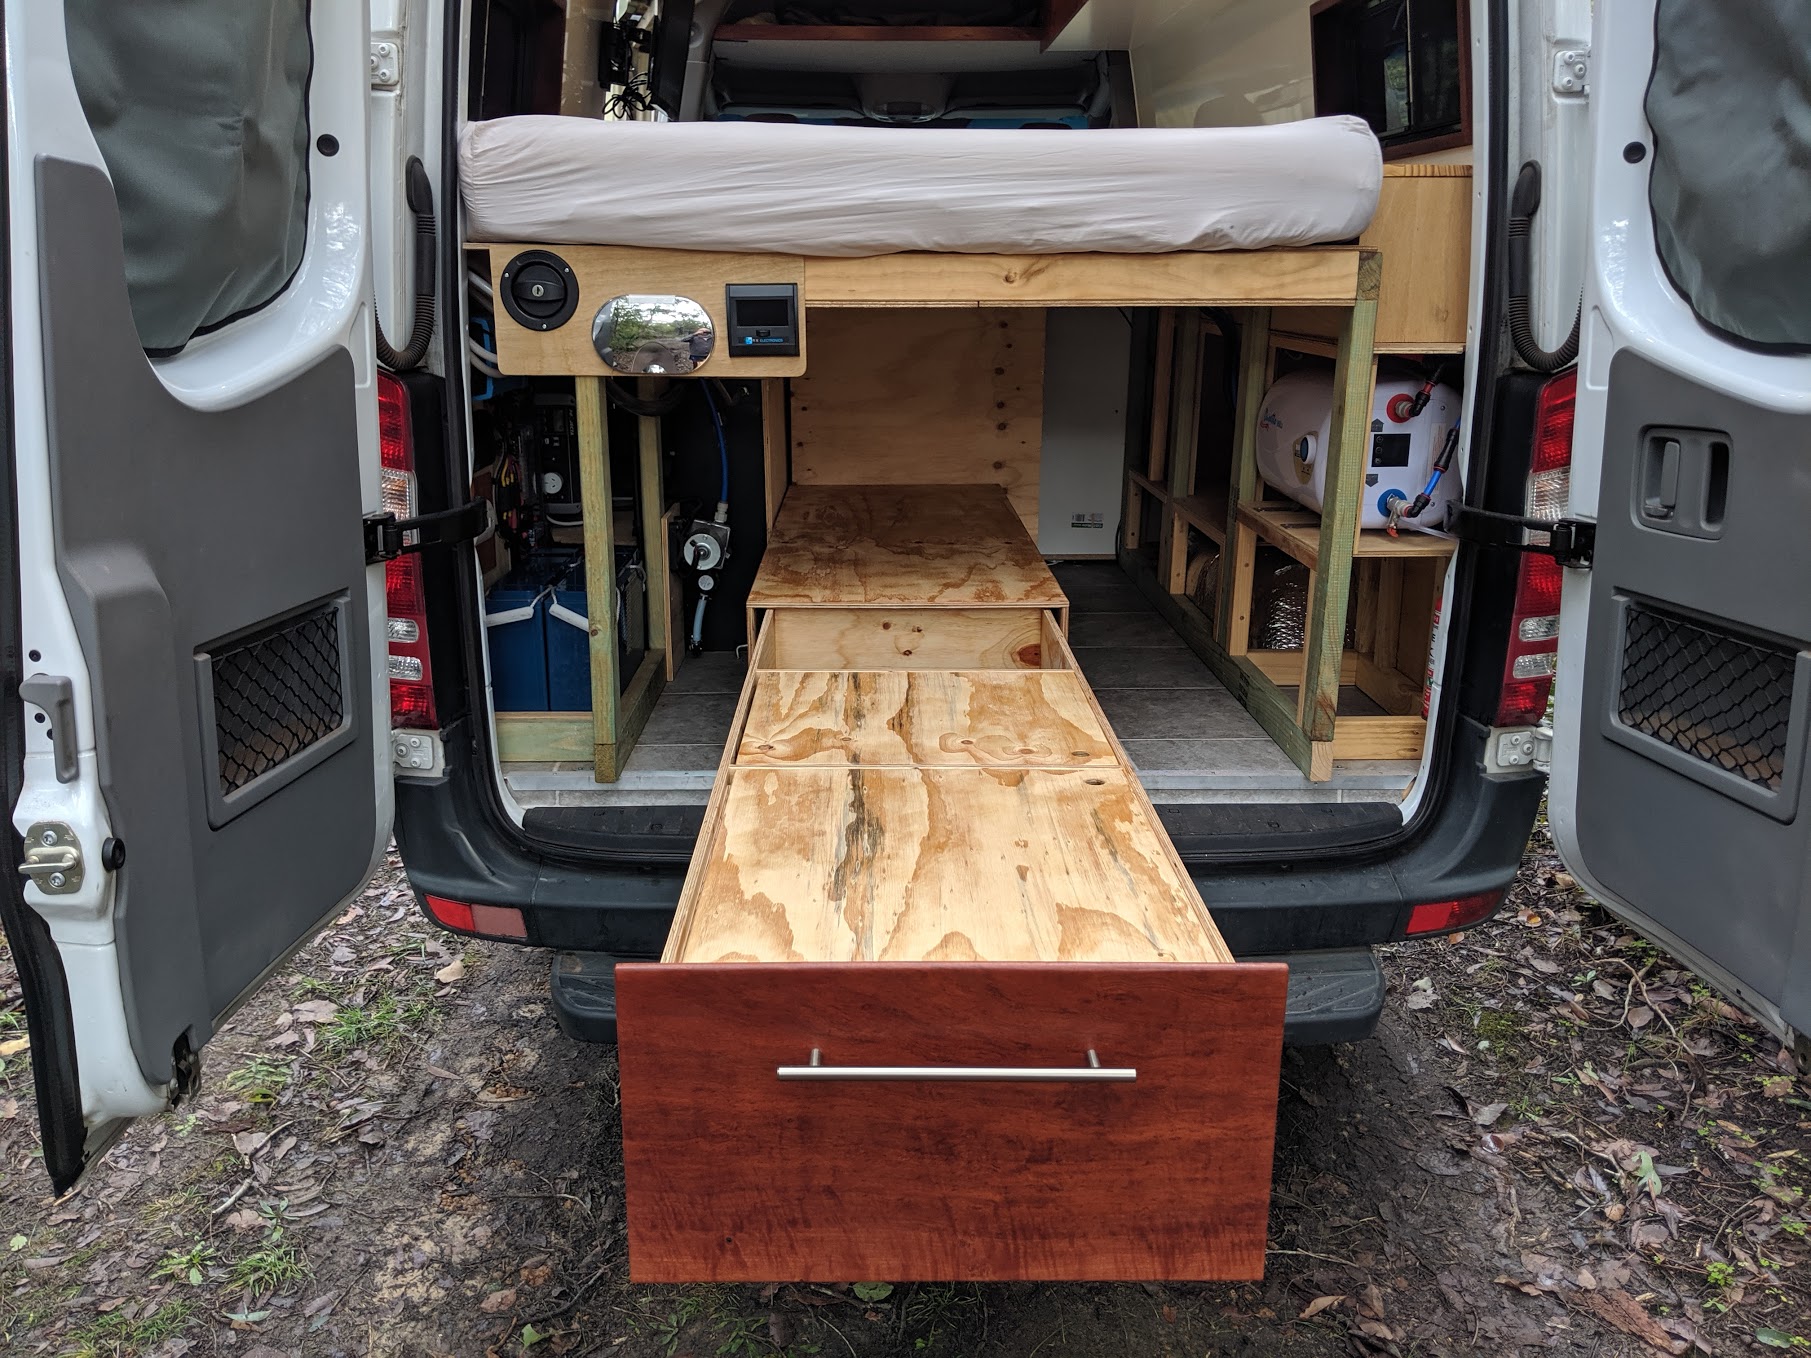
Drawer looking good
Seems like all the jobs now are small finishing bits, I gave the rear drawer 2 coats of clear enamel, the only thing in the van actually painted as everything else has had Danish oil, but sealing this was fairly important as I’ll cook on here. I made a jarrah front for the drawer and screwed on a nice large handle, made a nifty little catch on the side which is just a bent piece of metal rod that slides through the side of the box into a few carefully drilled holes in the side of the drawer to hold it shut or open at different points. The bent pin is kept in place by a small strong magnet I embedded in the side of the box.

Drawer
The front two sections have removable lids so they can be used as a table.
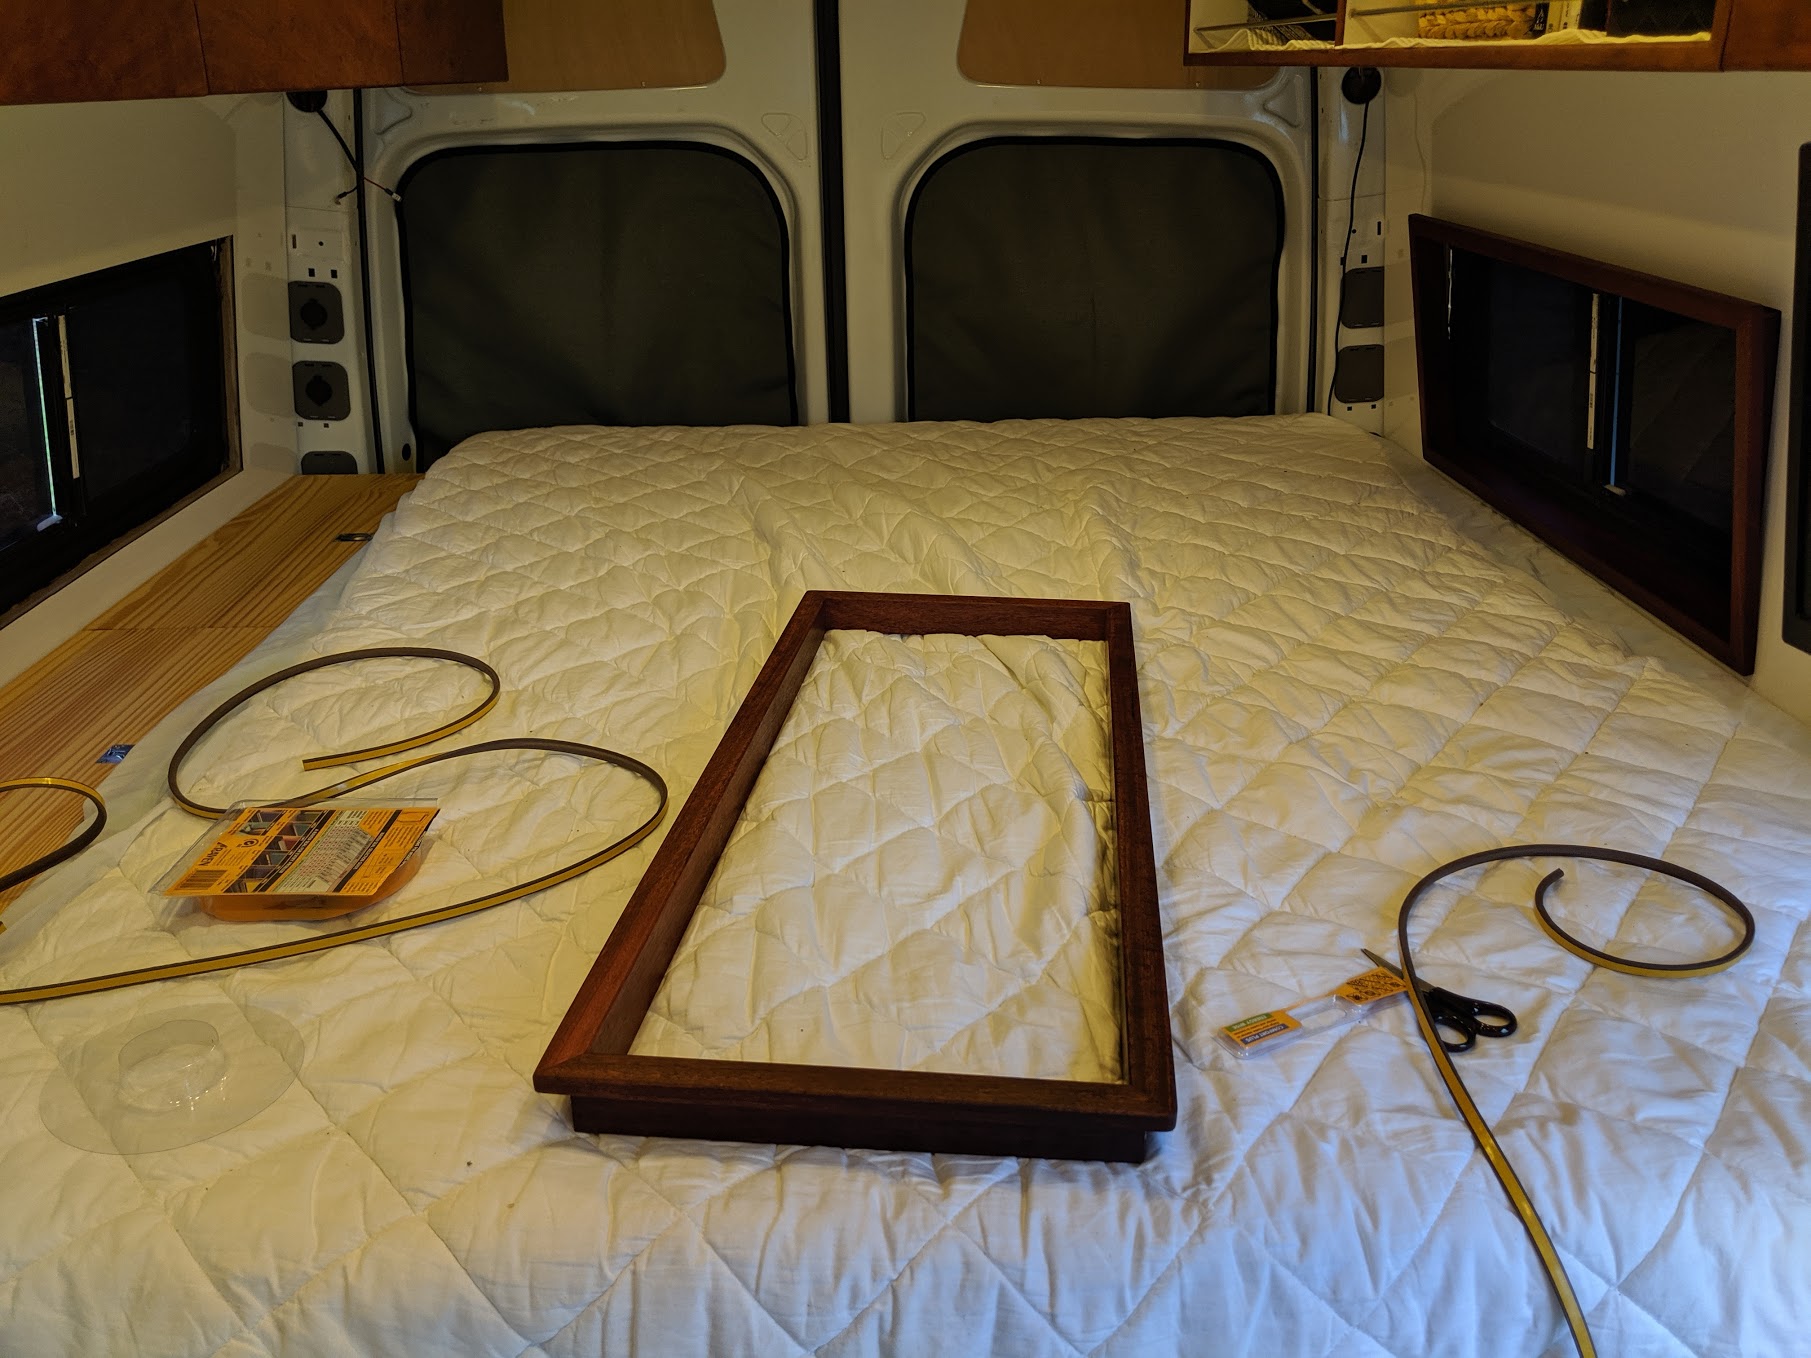
Window frames
One of the last big jobs, well one I wanted help with because this was fairly tricky was the window frames. They were different depths from front to back and different depths from top to bottom, so each piece had to be cut roughly to size, then individually scribed to fit correctly, cut, then glued together sanded and oiled. I painted the pine window surrounds black to match, then we used Sica to glue them in place after attaching a flexible seal around the edge. They came out looking great.
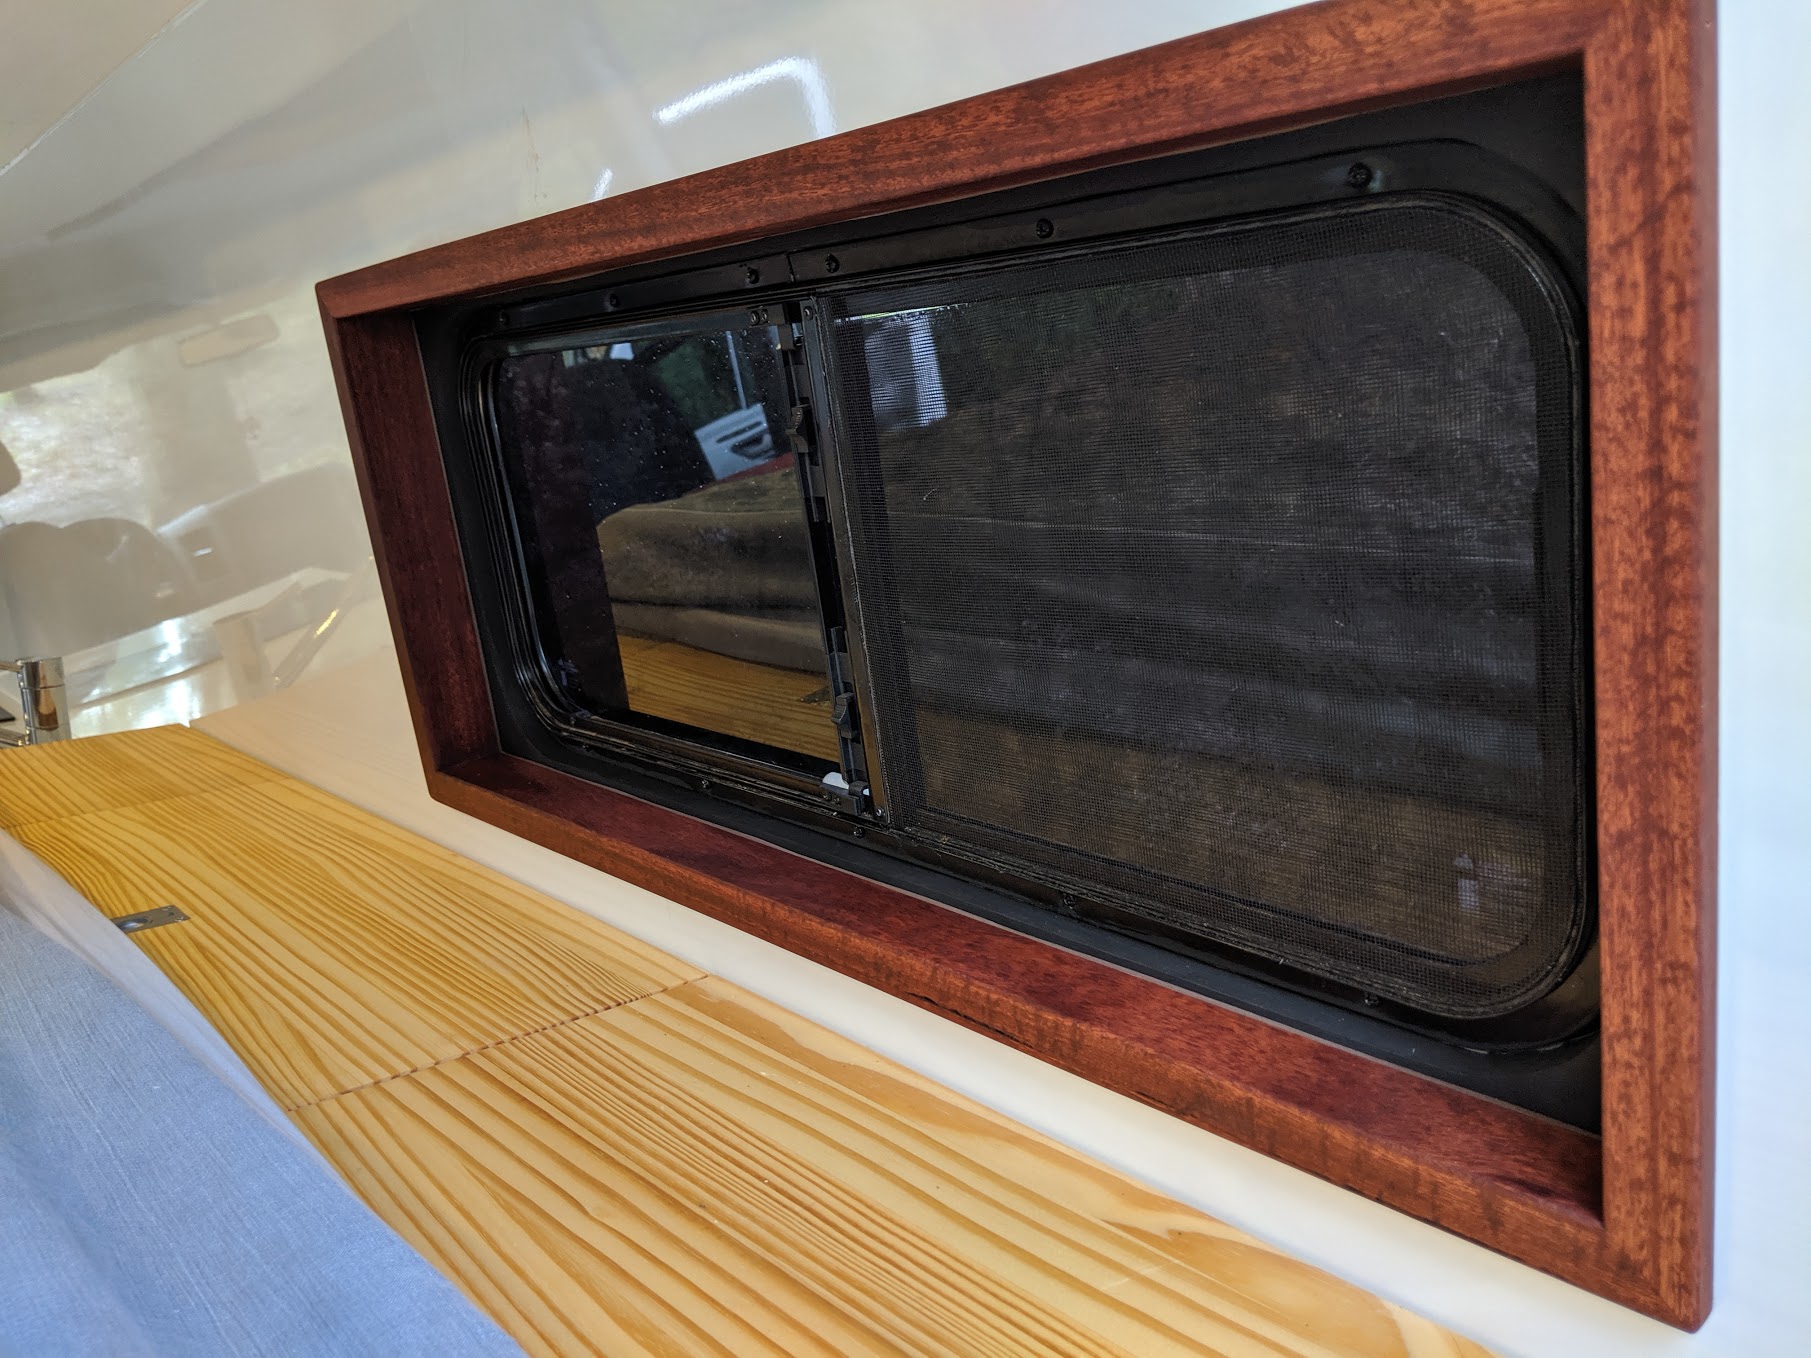
Window frames
Now things are pretty much done, I’ve been packing the van and technically tomorrow is “D” day, I decided to be in the van by winter solstice the 21st June. Ok the original plan was end of March, then Easter, so it’s taken twice as long as I planned but apart from a couple of tiny trim jobs it’s all finished. I’ll follow this up with a walk through of the finished and packed van shortly.
4 Comments
Joel your van is looking damn awesome! I’d be too nervous to drive this around after all that work.
Cheers Dave
Thanks Dave…. Yep it’s good to have it finally finished, now in it and travels have begun.. I try hard not to think about potential accidents..
Hi Joel,
Your van looks awesome, very good job I envy you for what you can do with it in Oz, perfect!
What’s happen to poor Priccy the Queen of all? By now you know who I am?!?!
Mate if you continue with your vehicle down/upgrade you will be soon like me on a backpack which is the ultimate way of travel anyway😀
Hope you enjoy your life over there, greetings over the ditch
Martin
Hahaha… G’day Martin.. 🙂 good to see you are still alive. Priscilla, now belongs to a young couple in S.A., they flew over and drove her back home again, and from the pictures they sent she looks like she is getting some loving, they hope to take her to Indonesia one day.. Ahh just found them on instagram, looks like 8 months later they are trying to selling her for $15,000 more than they bought her for. lol https://www.instagram.com/geckoandthefish/ And hey, I did the backpack for a couple of months up the bibbulman track, a great way to travel and I’m keen to give it another go soon.. You should let me know what you guys are up to sometime, why don;t you have a blog..? lol
All the best mate
Joel